Grilled Mackerel with Couscous and Beans Salad
What a lovely and sunny the last few days. The sea was calm and gentle breeze as I walked along the Thames Estuary. Always nice to walk along the "seafront" to the fish monger at Leigh-on-Sea. Today I bought three large and very fresh mackerels for under £8.
For lunch, I wanted to make something very quick and easy. These mackerels are just the best ingredient for the unusually hot end of September. It took no effort to make this deliciously fresh meal..
Ingredients: (serves 2) - A whole mackerel (gutted and slashed the fish both sides)
- Pinch of sea salt
- Generous amount of olive oil (delicious for other food)
On both sides of the fish sprinkle sea salt and olive oil all over. Grill the fish in the hot oven for few minutes each side. When it is ready, remove it from the oven and side aside. squeeze 1/2 of the lemon juice just before serving.
For the couscous and beans salad, I used a tin of "three bean salad"as the base, and add in the following ingredients: - About 1/2 cup of couscous (cook it as instructed from the package)
- 1 zest of lemon
- 1/2 juice of lemon
- Generous amount of capers
- Salt and pepper (to taste)
- 2 tbsp Oil from the grilled fish
- Fresh chives.
Mixed all ingredients together and plate it under the hot grilled mackerel. Drizzle lemon juice and some of the oil from the grilled fish around the food
Summery and fresh...
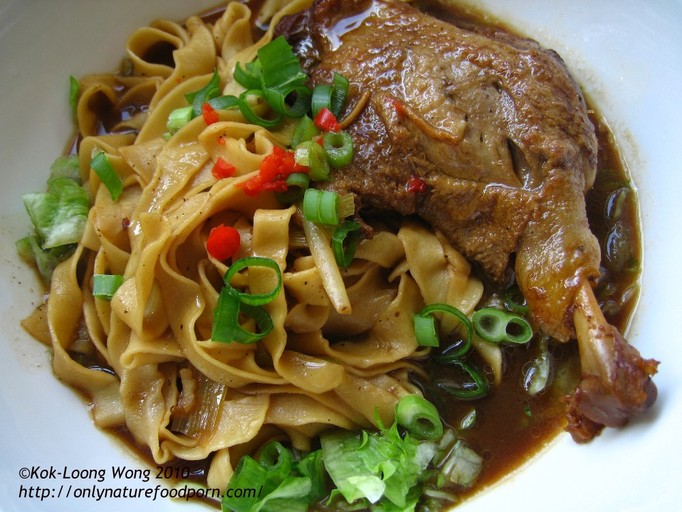
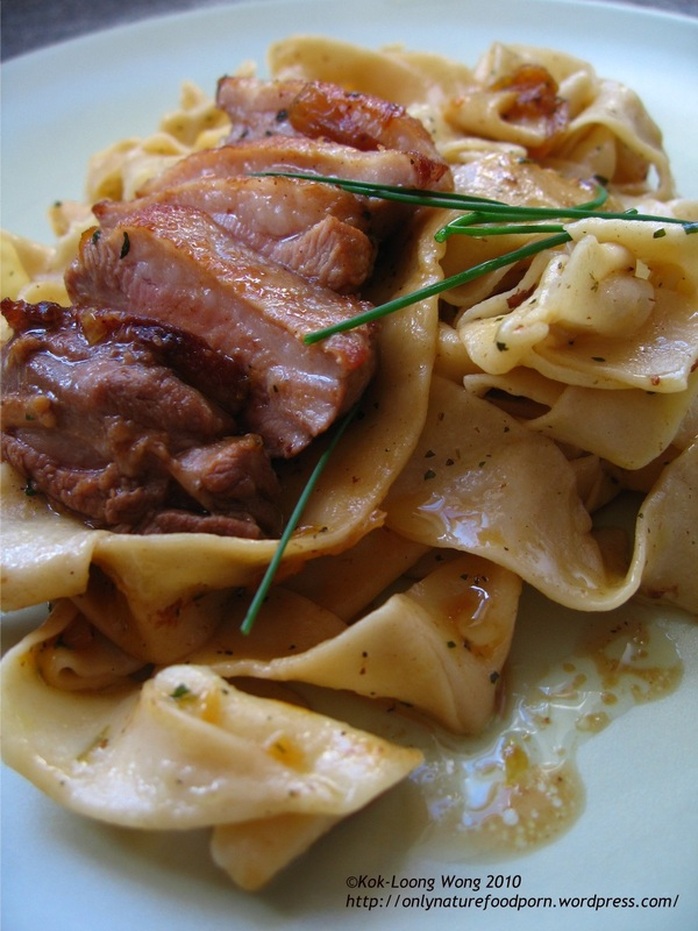
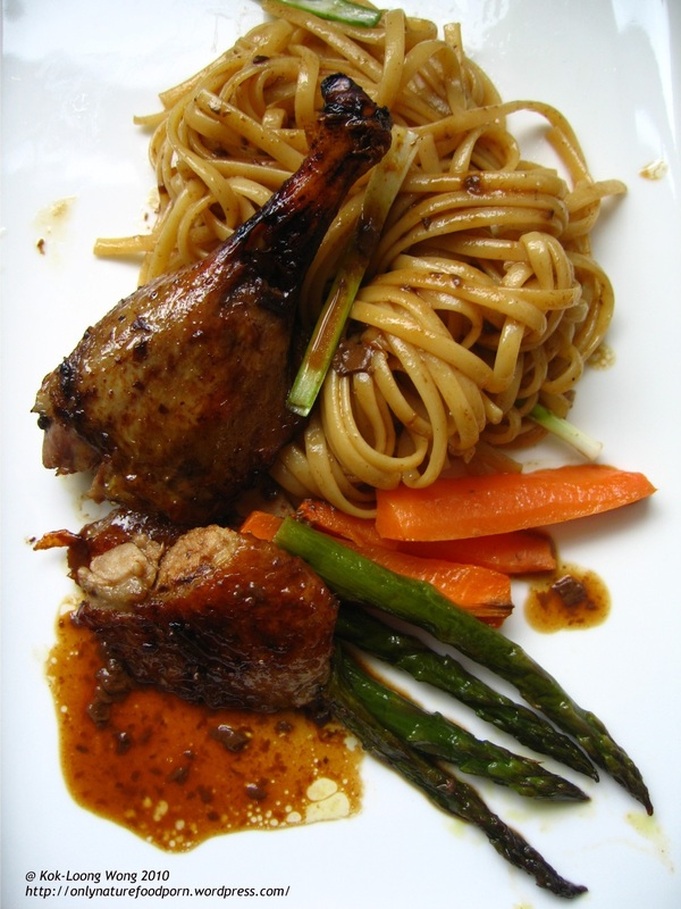
Braised Duck Leg Noodles
Italians! no more fighting. This is definitely a Chinese dish! I think my skill in pasta making...in this case, noodle is getting better each time. I have not eaten dried pasta from supermarket since last week! I think it won't be as nice as some home-made noodle! 
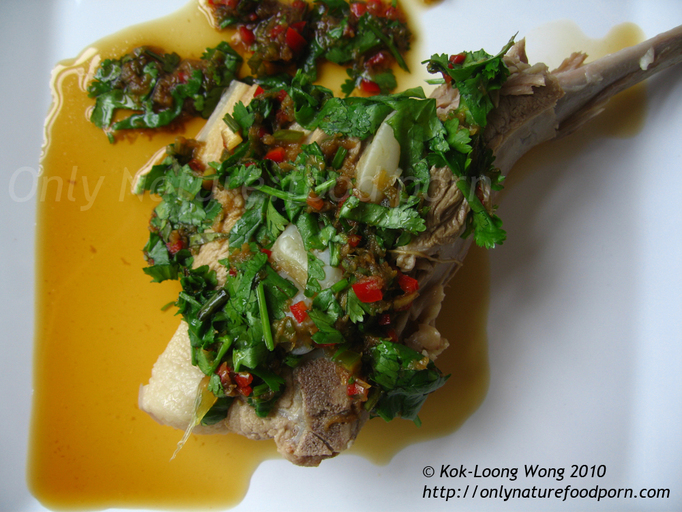
This is a strong aromatic herb based soup with a pinch of ginseng roots, slight bitter after taste. I am sure it is good for my health, too many late nights working on projects recently! Ingredients for Braised Duck Legs: (serves 2) - 2 duck legs
Group A:
- 1 stick of cinnamon
- Few whole cloves
- 1 clove of garlic
- 1 star anise
- Few pepper corns
- 1/2 tsp oil
Group B:
- Pinch of ginseng root
- 1 tbsp dark soy sauce
- 1 tbsp light soy sauce
- 1 pcs fermented tofu
- Water (just enough to cover the duck legs)
- Salt and pepper to taste
For serving:- A handful of thinly sliced iceberg lettuce
- Spring onion (Sliced)
- Chili slices
The Process:First lightly fry ingredients in Group A until aromatic. Add the duck legs, skin side down, and brown it lightly. Pour water and add ingredients in Group B, and cook under medium heat until the duck is soft and tender. Season to taste. * Make the soup a day before, the flavour will develop better
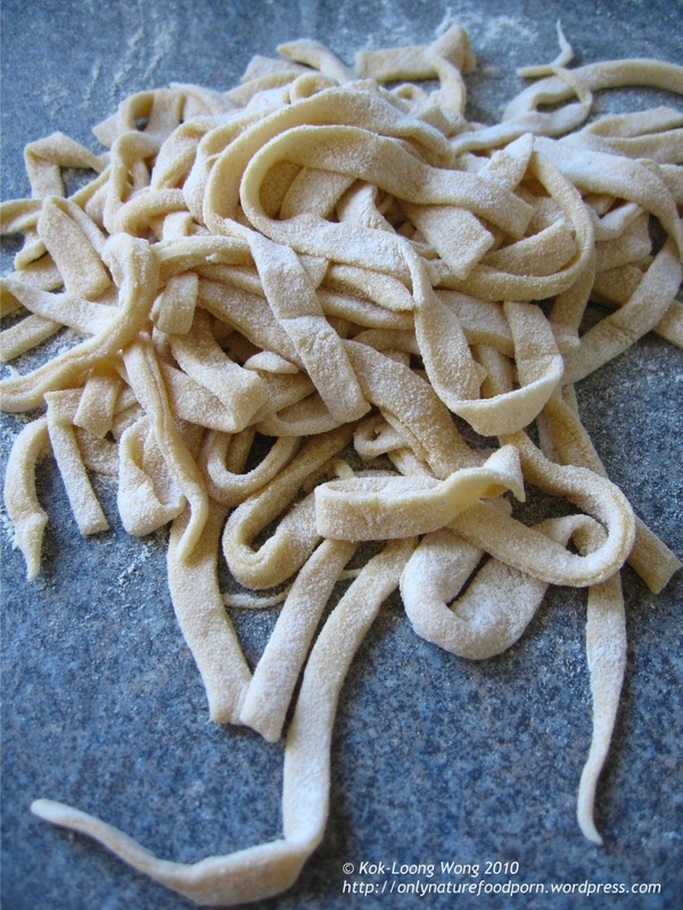
 * For the noodle:
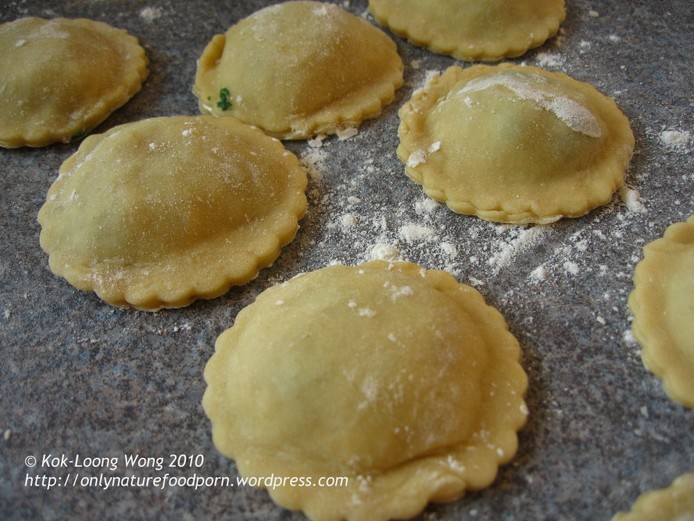
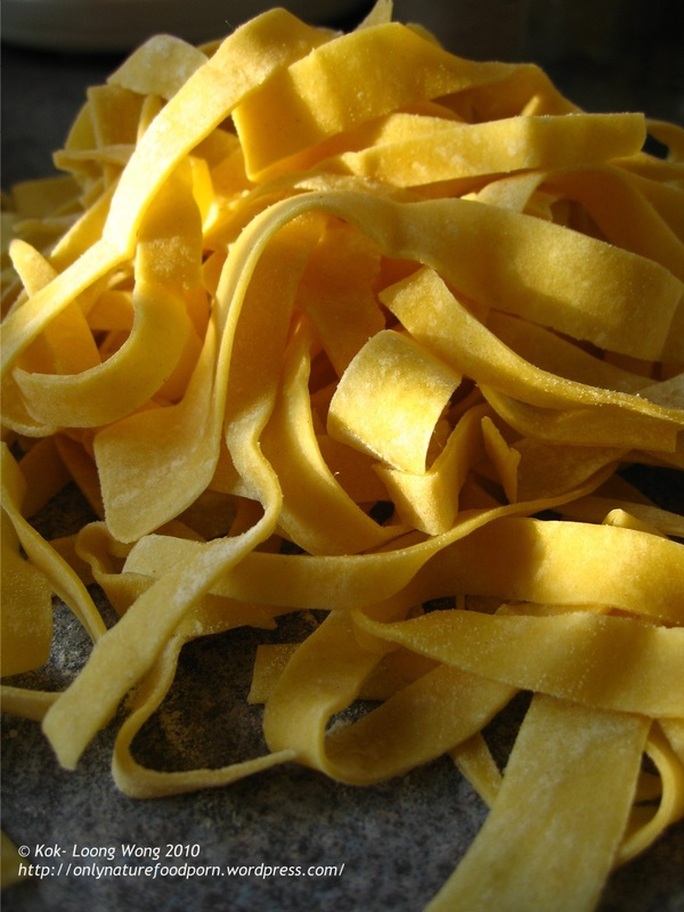
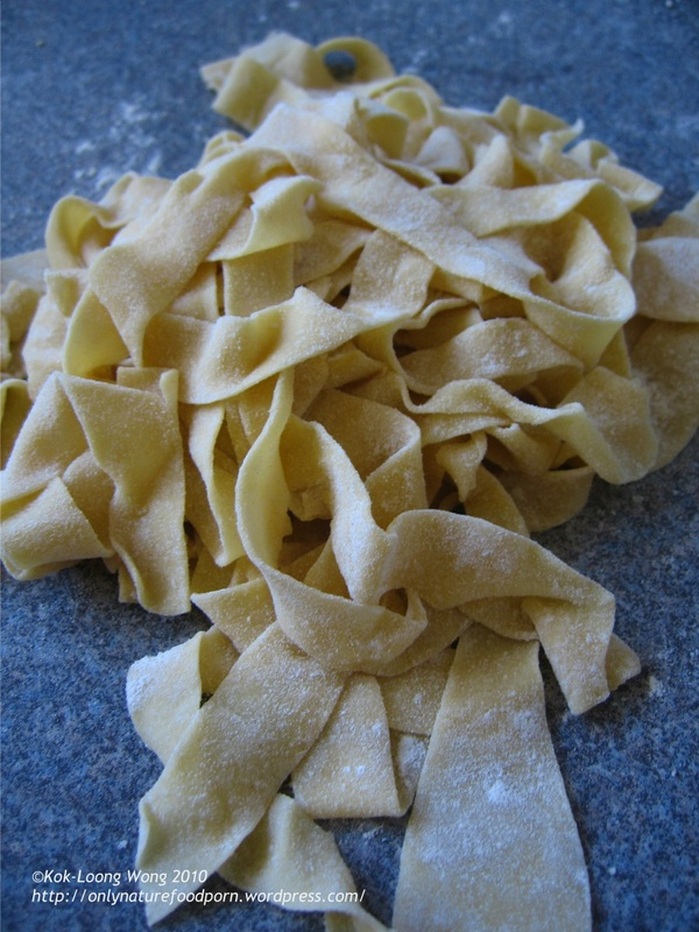
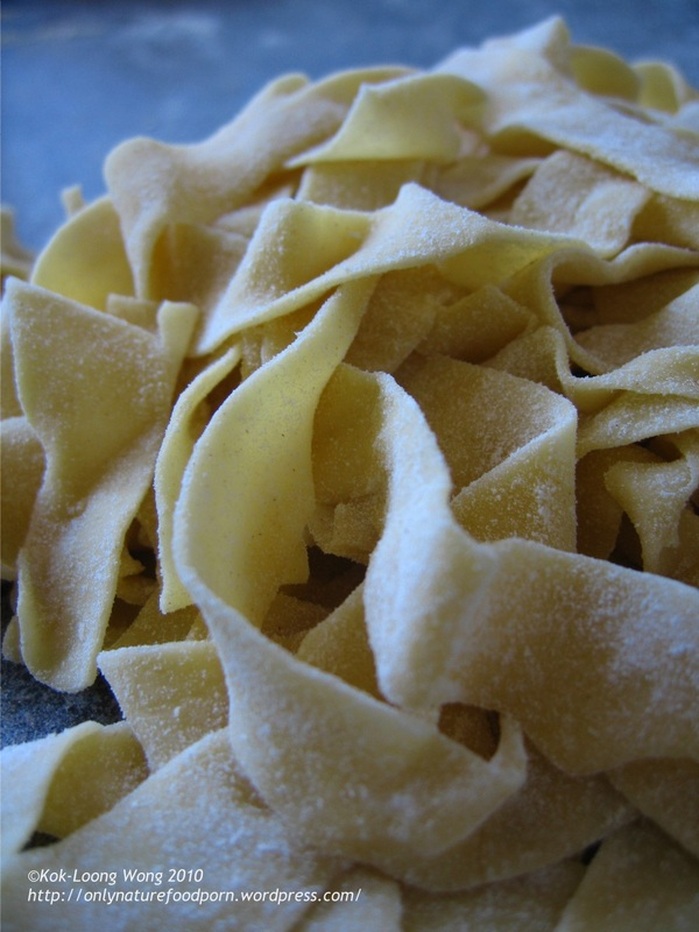
1 egg for 100g of flour. Mix/ knead to form a dough and roll out on a floured worktop with a rolling pin to thin sheets and cut into desirable size of noodles. Cook in boiling water for 2 minutes and drain. Put the noodles under cold running water for a minute or two. 
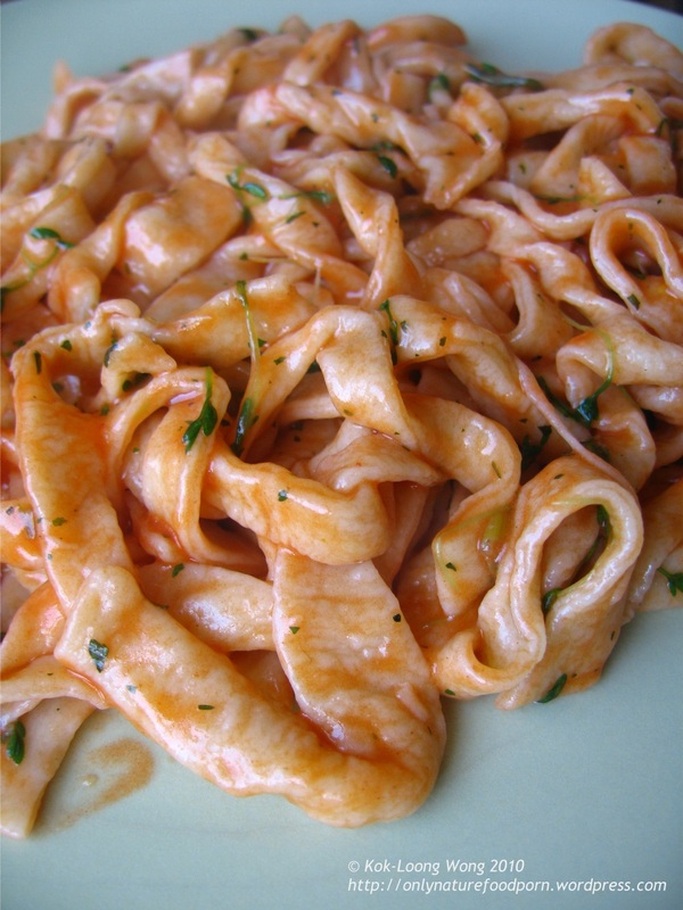
To serve this noodle, re-heat the soup (with duck legs still inside) for 2-3 minutes. Remove the legs and set it aside. Put the cool noodles in the soup and cook for further 2-3 minutes, to add some flavour to the noodles. In a serving bowl, line the bottom of the bowl with thinly sliced iceberg lettuce. Add the noodle soup on top and serves the duck leg whole. Garnish with spring onion and chilli. Serves hot...Yum!
Bacon "Ravioli" **
Pasta making attempt no 5: Just messing around with things! I am quite confident now to make my own pasta, with just rolling pin!
This time I added some dried coriander leaves, and few drops of truffle infused olive oil to the flour to make these duck egg pasta! These ravioli filled with fried bacon and chopped shallots with tomato puree! Serves with wilted rocket leaves, sprinkles of grated parmesan cheese and pepper.
Quite tasty actually! :)
OHH! My Italian food tutor just commented that " I am his worst pupil!" What is wrong with using coriander in pasta? It is a Mediterranean herbs!
** Disclaimer: This is by no means Italian pasta, just me messing around! :)
The "fight" of 2 Italians over my "not so proper" ravioli! Stefano: pasta with coriander?????? Loong, u r my worst pupil! :-) Loong: HAHA..is it wrong to use coriander?!Roberta: it's fusion pasta!!! hi hi hi looks delish again!!! why stop?! Stefano: mmmh... maybe it's fusion pasta, sure it's not italian pasta, and I'm teaching making italian pasta... And, of course, i'm traditionalist, talking about food! Roberta: well yes...being italian i know how italians never go away from "what the book says"...shame I think... food is all about taste and experience and combining flavours...italians for example don't know much about combining sweet and salty which is the base for a lot of other cuisine (indian, japanese, chinese ...) ... coriander is used on noodles andthe difference from noodles to pasta is....the name! (plus pasta was first made in china!) so I say...take the great tradition of pasta making and experiment!! I haven't taste coriander with pasta ever but...why not? Stefano: Roberta, I'm agree with you: for exemple, I like sweet and salty in asian food... but Loong is my pupil about italian food, and I must say that coriander is NOT ALLOWED in italian pasta! Anyway, he can make pasta as he wants, on condition that he doesn't call it italian pasta! :-) Roberta: hi hi hi italians are passionate about everything they do ...but they almost never fight... they discuss!!! almost always with a glass of wine and a good plate of pasta in front...it's the deal!!!
Now that is what food can do! Ahh..it wasn't a fight, just a "discussion"
haha!
Bacon & Walnut "Ravioli" - Pasta making attempt No 4
To all my Italian friends,
This is by no means an authentic attempt to make ravioli! I just wanted to see what I can do with my new pasta making skill I have just acquired! These raviolis filled with chopped bacon, walnut and wild rocket leaves... Any suggestions to make REAL ravioli, please write me a comment..
Thank you!
Egg Yolk Pasta-"pasta al tuorlo d'uovo" - Home-made Pasta Attempt No 3
If not careful, one can easily be a pasta making addict. I think I am one now! So much fun to make everything from scratch, and the taste and texture of the pasta is SO much different from those bought from supermarket! For this experiment, I used only egg yolks for making the pasta. 3 egg yolks for every 100g of plain flour. The texture of this pasta actually quite similar to " mee pok"! This pasta has this Chinese wonton skin look too!
Duck Egg Pasta "pasta all'uovo d'anatra" - Attempt No 2
The second attempt of pasta making at home. I think I am getting better! This time the pasta is nice and thin. (Bear in mind, only with rolling pin!)
Just a small twist..with duck egg! As usual, 1 egg for every 100g of flour. There is 00 Grade Pasta Flour available in the supermarkets, but I have tested making pasta with various different types of flour. Experiment different ingredients is rather fun!
"Tagliatelle"...Home-made Pasta Attempt 1
A lot of the recent posts were written a while ago. Now that I am going through all of my previous postings, I am going to over-write all the initial sequence of the date it was initially posted.
I love Italian food, the simplicity of it. The last two times when I was in Rome, I spent too much time and money wondering around the Trastevere Area...the ice cream...mmmm
This was the first attempt to make pasta at home. It was really FUN. I've never attempted to make pasta my own! Now I have an online Italian food tutor, Stefano, I will try to make some Italian food, the proper way!
This first attempt is not as nice looking as your shop-bought fresh pasta..for sure! But bear in mind that, I have no pasta making machine, so everything is "hand" made!
The ingredient is very simple. for every one egg, you use 100g of flour. Mix the ingredients together to form a dough and roll it out on a lightly floured worktop with a rolling pin, as thin as you can! Then cut it to "thin" strips.
Cook the pasta in boiling water for 2 minutes (with a bit of olive oil). For this trial, I have only added some tomato paste with some seasonings as sauce, as I wanted to taste the "raw" ingredient - the pasta....
The texture was nice, I think. A lot firmer then ordinary fresh or dried pasta you can buy from shops. But maybe that was a fault?!
Mung Bean Paste Fritters
These fritters are the deviants from what was supposed to be the mung bean paste pastry filling! Initially, I was trying to re-create the savoury mung bean paste as the alternative filling for the Chinese Bean Pastry I made last time. But half way through, I thought I want to experiment using the bean paste to do something different! From memories, I recall there is something similar in one of those kuih (snacks) made by my Malay friends. But this recipe mainly experimental! I can not really put these fritters into when it should be served, to be quite honest. It is savoury with a hint of sweetness. It is not quite right for desserts (because it has the hint of garlic) or as side dish for a main course. But It is definitely quite hard to stop not eating it when you have your first bite. Ahhh...Maybe this is a good picnic snack! Ingredients: (for the Bean Paste)- 1 package of dried mung bean (soaked overnight and steamed for 30mins to soften the bean.) (This is MORE than enough to make a dozen of the fritters, but you may used only half of the cooked bean paste to make enough of fritters for your need)
- Few cloves of garlic (finely chopped)
- 1 shallot (finely chopped)
- 1 tbsp Sea salt
- Approximate 1/2 cup oil (more if the bean paste appears to be a bit too dry)
- 1/2 cup sugar (or to your own taste)
- 1/2 tsp Pandan essence
The process: (Stage One)Mash the cooked beans throughly while they are still hot and set aside. (It doesn't has to be finely mashed) In a large deep pan, heat the oil and gently fry the garlic and shallot until they are lightly brown. Add the mashed beans and mix them well in the pan. Fry the bean paste in the pan for few minutes. Add more oil if you feel the bean is a bit too dry. If the bean paste is a bit too rough, mash it further until a desired consistency. Add the sugar and pandan essence to the paste. Mix well. At this time, the paste should come together and slightly sticky. Cook for few minutes until you think they can stick nicely together to form a round shape. (Add more sugar if you like it sweeter)Remove the paste from the pan and set it aside to let it cool down. Once cooled, shape the bean paste in to 5cm diameter balls and flatten. Side aside for the final stage. (the cake should be firm and not brittle) Ingredients: (for the Batter to coat around 8 fritters)- 1/2 cup Rice flour
- 1/4 cup Corn flour
- 1 Large egg
- 1/2 tsp Turmeric powder
- 1 tbsp Sugar
- Enough water to mix all the ingredients together.
The process: (Stage two)Combine all ingredients together to form a double cream consistency batter. In a deep pan, heat enough oil to fry the fritters. Coat each bean paste "cake" generously with the batter and dip it into the hot oil and fry until golden brown. Serves warm or at room temperature.
Fruity Seafood Stir-fry
The weather for the last couple of days was really nice; sunny and breezy. I spent hours walking and just sitting by the waterside watching people kite surfing and enjoying the very few last sunshine of the year before the winter sets in. There is a fish monger just by the "seaside" ( Thames Estuary actually) at Leigh-on-Sea, near where I live, my favourite place to get fresh seafood. I thought I want to eat something summery and fresh...nothing beats fresh seafood for a refreshing and light summer lunch. Whenever I am by the seaside, the phrase " Frutti di Mare" keeps cropping up into my mind. I remember my dad used to cook squid with pineapple. Something quite nice about the combinations of fresh fruit and seafood, both are subtle in taste but complement each other nicely without overpowering flavour. Instead of pineapple chunks, I thought satsumas and the shrimp paste would add some interesting twists to the dish. The sharp sourly taste of the satsumas would bring out further freshness of the fresh squid. The shrimp paste would add depth to the sauce. A quick and easy dish to prepare. Ingredients: (serves 2 portions) - A whole large fresh squid (wash and cut open the tube and score diagonally the flesh in opposite directions)
- Approximate 100-150g of fresh prawns (peel the shell but leave the tail intact)
- Few satsumas (peel and segmented)
- Handful of cherry tomatoes (cut it half)
- A green pepper (slice into chunks)
- A green chilli (roughly chopped)
- A clove of garlic (finely chopped)
- A shallot (finely chopped)
- 3 to 5 tbsp thick coconut milk
- 1/2 tsp thick shrimp paste
- 1/2 lime juice
- Basil leaves (for garnish)
- 1-2 tbsp oil
The process:In a wok (or pan), heat the oil under medium/low heat and add in the garlic, shallot, green chilli and gently fry it until soft, colourless and fragrant. Add 1/4 of the tomato halves in the wok and cook them until they are soften and juicy. Meanwhile, mix the shrimp paste, coconut milk ad lime juice together to form a light sauce. Set aside. When the tomatoes are all soften, increase the heat ( for 1-2 min), then add the squid pieces and prawns. Stir and coat well the seafood with the tomato sauce and cook for a minute or so. Add the rest of the fruity ingredients in the wok and cook until the seafood is almost cook (need to apply your own judgement here!). Just before the seafood is cooked, stir in the shrimp paste sauce to the seafood and cook for further 1-2 minutes to slightly thicken the sauce. (Never over-cooked the seafood. It should be tender and juicy!)And the dish is ready to be served. Serves it hot with white rice or couscous....A perfect summer dish by the seaside.
Daifuku 大福((Rice Flour Balls)
I can not remember when was the last time I had Japanese food. Since my Japanese friend, Junko, is coming for dinner, and Daifuku is her favourite dessert, I thought I will give it a try, hopefully to get some constructive comments and rating from her authentic Japanese taste buds! Traditionally, yomogi herb powder is used in the dough, since it is not easily available in London, I substituted the yomogi powder with green tea powder instead. (I grinded the tea mixture from a green tea bag to form the powder!) The original recipe for the dessert is from The World Cook Book Collection - Japan. This is not an easy recipe. The making of the glutinous rice dough was the main challenge! But fun! Ingredients:Adzuki Bean Paste (Anko):- 1 tin of adzuki bean (drained but leave approximately 1/3 of its original water for cooking). (The weight for a tin of adzuki beans is about 235g)
- 250g sugar
- Pinch of salt
Put the adzuki bean in a pan over a medium heat, stir in the sugar and salt when it starting to boil. Stir frequently and mash the bean to form a thicken paste. Leave it to cool. For the dough:- 250g glutinous rice flour
- 300ml water
- 100g sugar
- 1 tbs green tea powder
- Corn flour for rolling out the dough
Mix water and flour together and boil it in a bowl over a pot with simmering water for 20 minutes. Stir frequently with a wooden spoon. The mixture will thicken and a little sticky after around 20 minutes. Divide the dough into two bowls. Add half of the sugar to one of the bowls and stir with a wooden spoon until a white, compact and homegeneous dough is formed. Mix the other half of the sugar with the green tea powder, and stir it in the other bowl with the dough. Mix it with the wooden spoon to form similar consistency as the white dough. The green tea dough will have a hint of light green. Sprinkle some corn flour on the working surface, roll out the dough until the thickness of 5mm, cut it with a small round pastry cutter, place a generous tablespoons of Anko over dough, seal and form small round balls. It is ready to serve! どうぞ食べてください!douzo tabete kudasai!(enjoy the dessert) Junko's comment : "I had missed nice Japanese dessert for long time in London. Your Daifuku was really good!!! I enjoyed nice fresh home-made daifuku! It was one of the best in london! Thank you!"PS. The green powder on one of rice balls is the real green tea powder. My birthday present from Junko! Thank you!
|