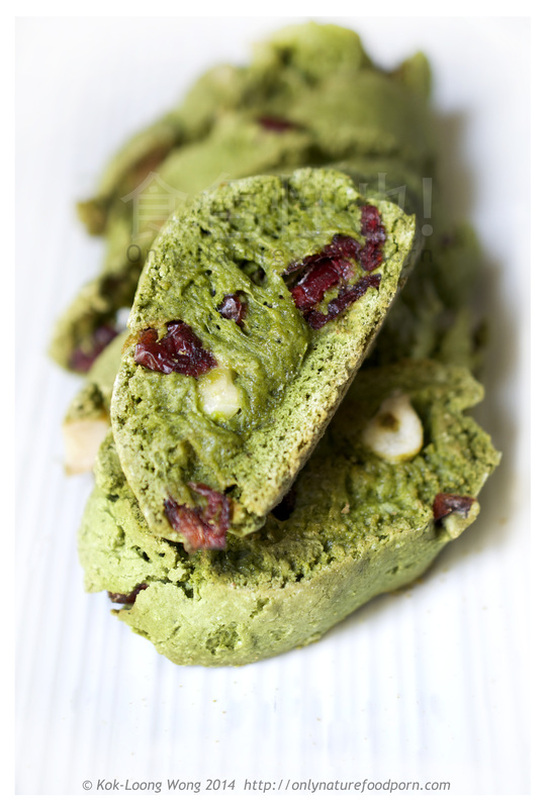
  Matcha Green Tea Biscotti with Cranberries and Macadamia NutsMy flat was infused in the toasty fresh moss scent last night when these biscotti were baking in the oven. Almost like being in a forest by the camp fire. I imagine that would be the kind of feeling being in a transitional Japanese chanoyu (tea ceremony) in a rustic chashitsu (tea room). All these reminded me of my favourite book, The Book of Tea by Kakuzo Okakura. A book that has a big influence on my view on things/life and architectural designs. I should read it again!
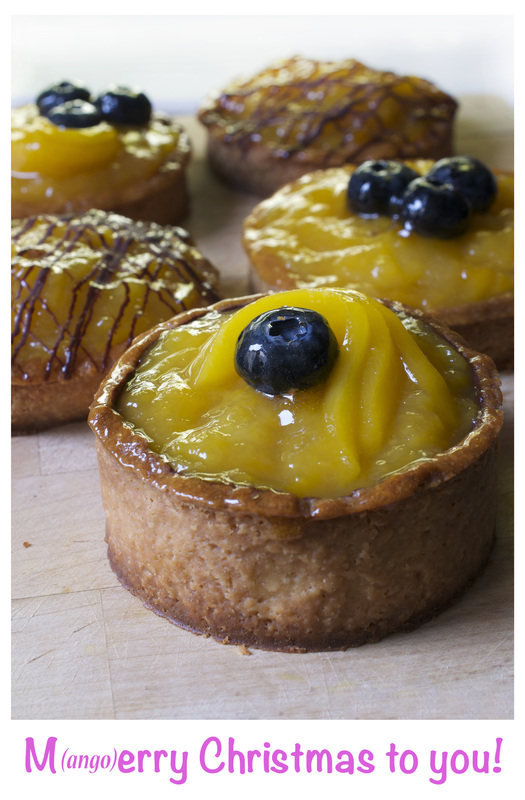
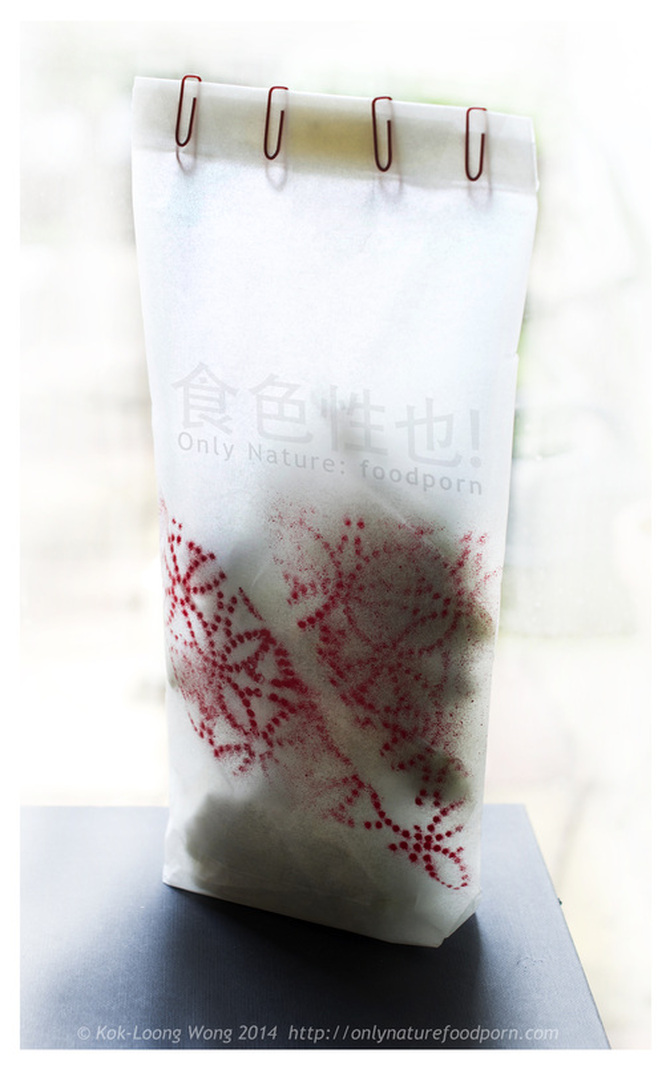
The green tea powder for these biscotti is not just the colour, the 2.5 generous teaspoon of the matcha powder adds great toasty-ness and makes the biscotti just like a cup of green tea but in a crunchy way! I do really like the idea of "eating" green tea. The red of the cranberries and white of the macadamia nuts made this biscotti almost Christmasy! The basic biscotti recipe I always use is on here, just a few twists, you could create your special version! I have also made other unusual biscotti before.. And I have even designed and handmade the packaging to go with the Japanese theme! The effect of the translucent parchment paper with red pattern goes really well the the silhouette of green contained inside..:-) 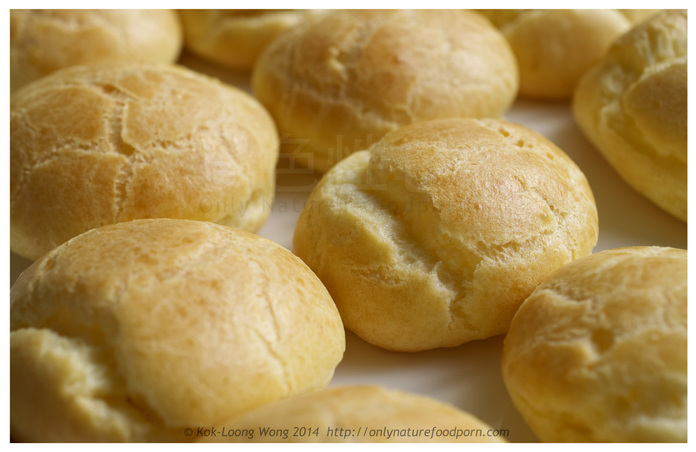 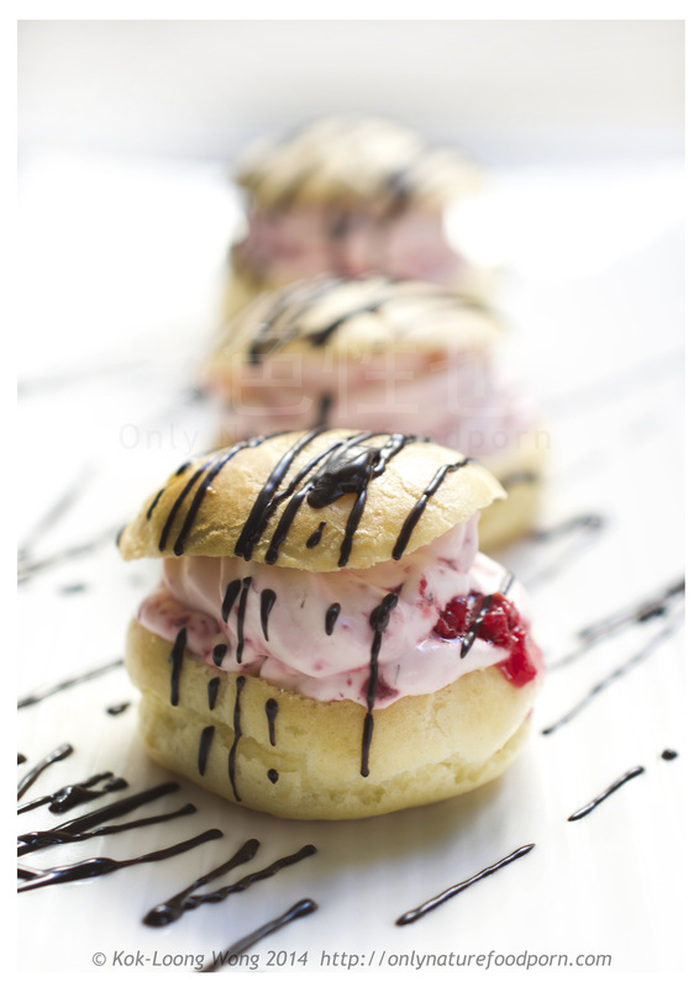 Pastry Challenge: Raspberry Cream ProfiterolesThe second attempt of making these choux pastry and profiteroles. I am really quite pleased with the result. If I keep perfecting my skills, I should master it soon! The reference of the choux pastry recipe was from The Cook's Book. One of my favourite comprehensive and informative cookbooks. I have learned a lot of new cooking techniques from this book. It has various chapters for different types of food and each recipe has it step by step instructions and accompanied by sequential photographs. Note: I don't get any commission by promoting this book! Something new for me about choux pastry making is that it should be made with equal amount of water and full-fat milk in order to achieve a smooth pastry consistency. Just using water will only result in rough pastry. I think the smooth pastry does give a more professional feel to the final presentation of the profiteroles. For the pastry recipe, you could refer to any choux pastry recipes that you could get hold on from online or other resources, but maybe consider the equal water and milk formula (if the reference recipe only uses water). For the refreshing raspberry cream filling, I simply whisked double cream until stiff, and then add few generous tablespoonful of mashed frozen or fresh raspberry to the cream. You can either pump the cream into the puffed pastry, but personally, I think a cut-top profiteroles with cream filling visible would add more visual excitement to the final presentation.  Blueberry and almond tartThis is quite an easy tart to make. An impressive dessert for any potluck gathering. Or any day when you really fancy some decent dessert without having to spend a lot of money to buy them in a patisserie. Homemade tarts are always taste much much better (and cheaper) than those from the supermarket!
There are two stages to make the tart. Stage 1: The Pastry. Ingredients:
Rub the butter into the flour until they resemble fine breadcrumbs texture and then mix in the icing sugar and orange zest. Add one egg yolk at a time to the flour mixture until incorporated. Finally add one tablespoon of the orange juice at a time to the flour mixture and mix until all come together as a dough. Wrap the dough with the cling film and refrigerate it for 30 minutes. Preheat the oven to 180'C. Prepare the 22cm fluted loose base flan tin by rubbing butter all over the internal surfaces. After 30 minutes, roll out the pastry to about 3mm thickness (big enough to cover the whole flan tin). Gently press the pastry in place within the flan tin and chill it in the fridge for another 20mins. Crumple a large piece of parchment paper (enough to cover the flan tin) and then carefully open it up and line it over the chilled pastry. Sprinkle ceramic baking beans over the parchment paper and blind bake the pastry for 15mins. Then set it aside to cool down completely before the next stage. Stage 2: The filling Ingredients:
Preheat the oven to 180'C. Use an electric hand mixer, cream the butter and sugar together until light and fluffy. Add the orange zest and essence and mix well. Add the egg and mix it until fully incorporated then mix in the egg yolk and beat until well mixed. Then add the thick double cream. Beat until everything is fully incorporated. Gently fold in the flour and ground almond until just combined. Spread the filling mixture over the cooled pastry case, the level it. Sprinkle the blueberries over the mixture. Bake the tart in the oven for 30-35minutes or until the crust is golden colour. Insert a skewer to the middle of the tart, if it comes out clean, the tart is cooked. Remove it from the over to cool down. Allow the tart to cool down before removing it from the flan tin. Done! The tart tastes good if serves warm or cold! Simple! 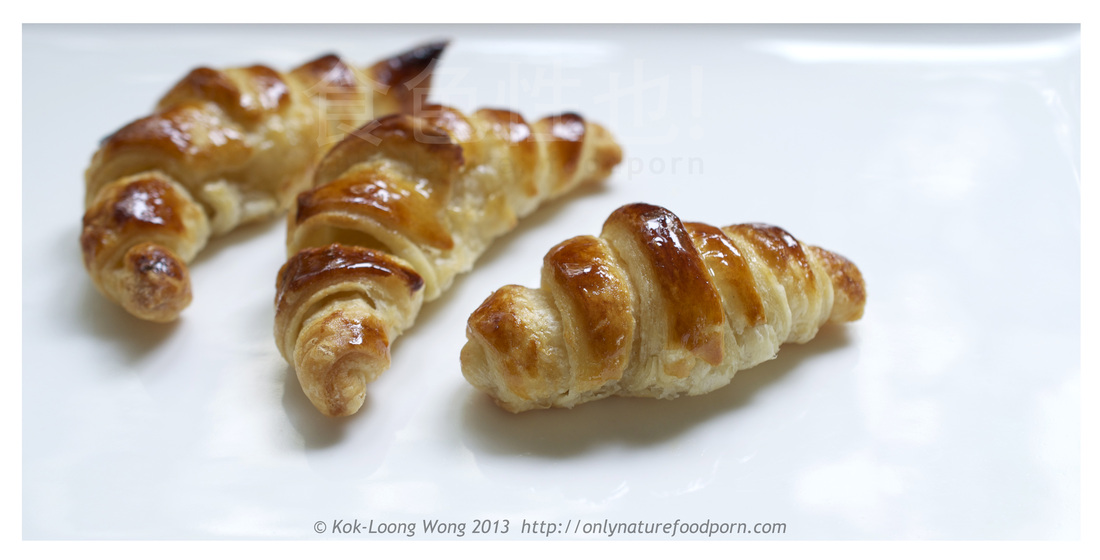 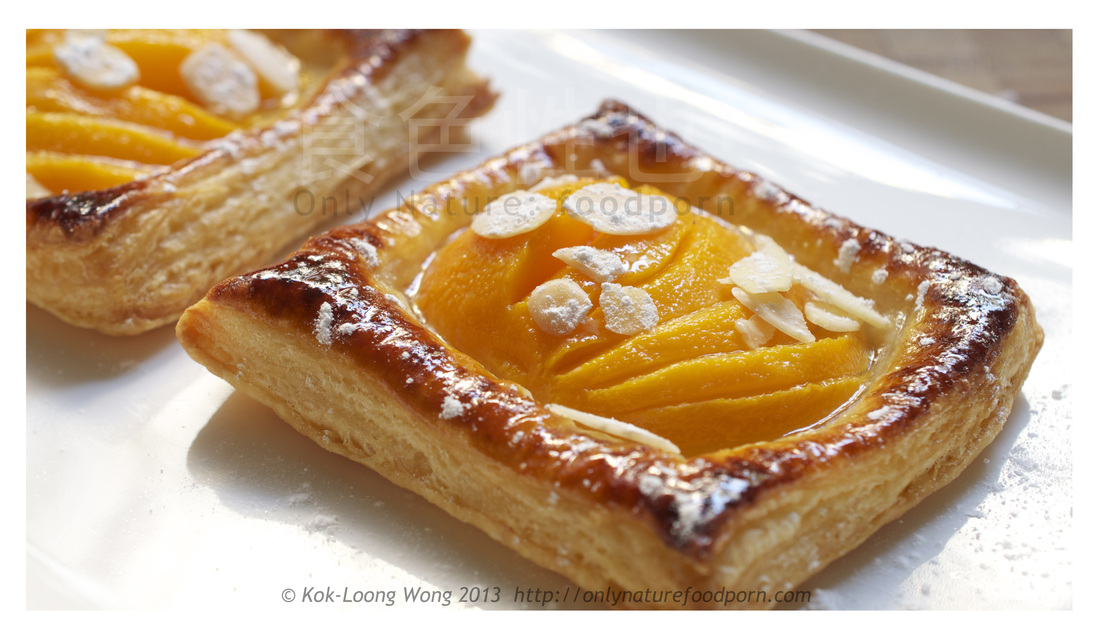  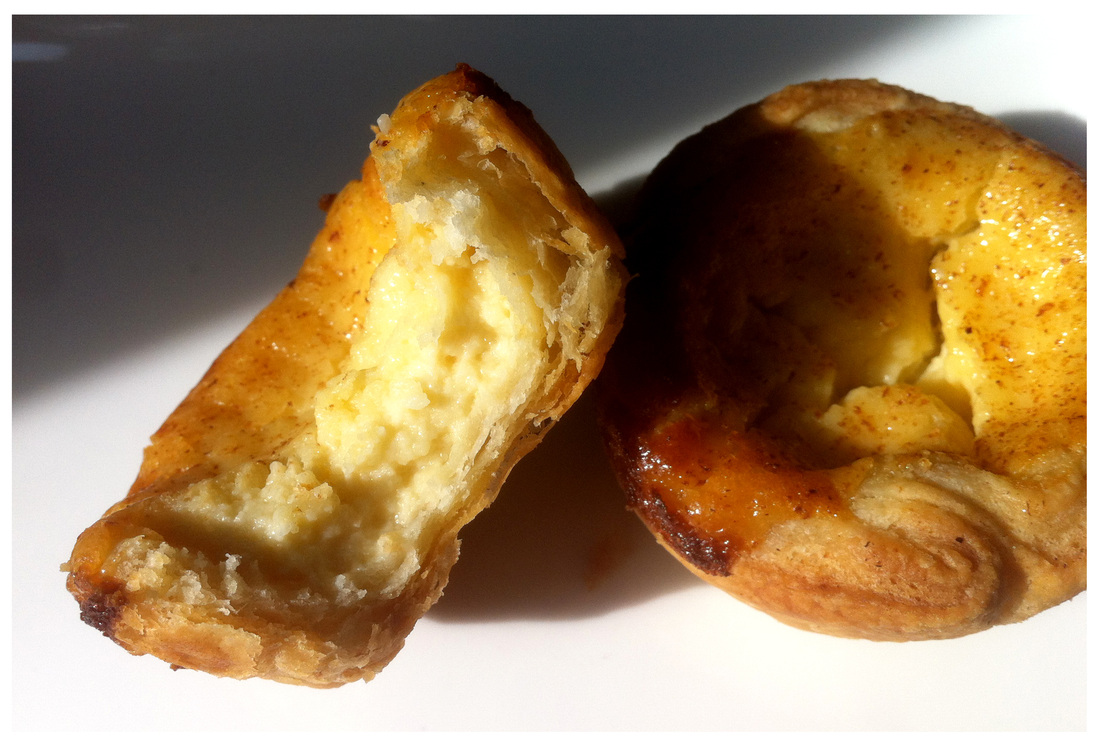 Delia's Rough Pastry Making DayI have a couple of failed attempts of making croissants. It was quite some messy trials. Hence, I have never want to try to make puff pastry, they are kind of similar in the making process. Further more, those shop-bought puff pastry are much cheaper and easy to handle. But not as exciting as home-made ones.
I always refer to Delia's "Complete Cookery Course", when I want to learn some cooking techniques the proper way. This book was a Christmas present from someone whom I used to be quite close with. It is such a shame that we are now on different paths in our lives, and no longer in contact. He will always have a place in my heart. If you can get on hold of the book, the John Tovey's Rough Puff Pastry recipe is on the page 520. Quite easy to follow. For half of the ingredients stated in the recipe (Instead of using half margarine and half lard, I replaced them with just butter). I made 3 different types of pastries (for fun!). Few mini puff pastry croissants, few peach tarts, and some egg custard tarts. They are all quite tasty. The pastry is flaky, crisp, and light. Very good result for the first attempt I think! 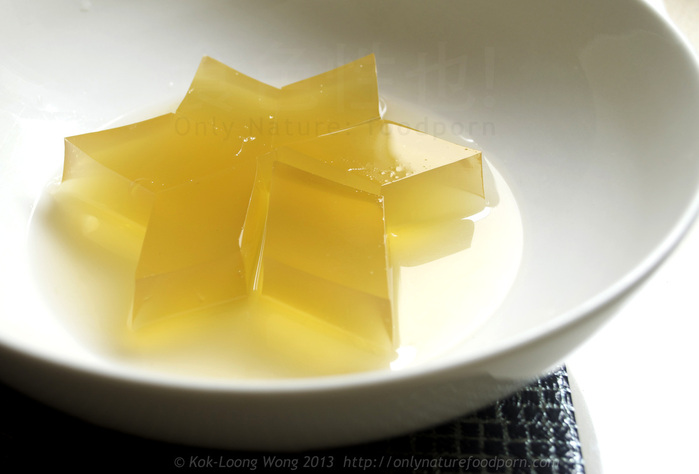 Mock "Ice Jelly" - "愛玉冰"Found a forgotten package of dried chrysanthemum flowers in my store cupboard. The cooling effect of the chrysanthemum tea is perfect for the summer. I wish I found it much earlier. The weather was rather hot (but nice) during the last couple of weeks.
The initial idea was to make some chrysanthemum tea jelly, but once the jelly was set, I thought it looked rather like "Ice Jelly" - "愛玉冰". a refreshing cool dessert with lime juice syrup that you can get in Asia. The slight bitterness of the chrysanthemum tea would make a perfect complement to the lime juice syrup. A very refreshing experiment of chrysanthemum tea jelly and lime juice syrup! To make this dessert, you will need:
To make the tea, firstly wash the flowers and then boil them in a pan of water for at least 5 minutes until you get a beer yellow colour consistency. Drain the tea with a sift. Add the sugar. Measure about 400ml tea and add the gelatine. Stir well until the gelatine is fully dissolved in the liquid. Pour the liquid to a container and let it set for use later. Then cool it in the fridge for 1hr. For the lime juice syrup, squeeze the juice of one lime. Measure the lime juice. Add one portion of the juice with two portion of the same amount of water to the juice in a pan and add 2 large tablespoonful of sugar. Boil the syrup mixture for at least 5 minutes. And then set it aside to cool down. When the jelly is set, cut or scope it out into a bowl and add few tablespoons of the lime juice syrup to the jelly. Done! Excellent to serve this dessert cold during a hot summer day... 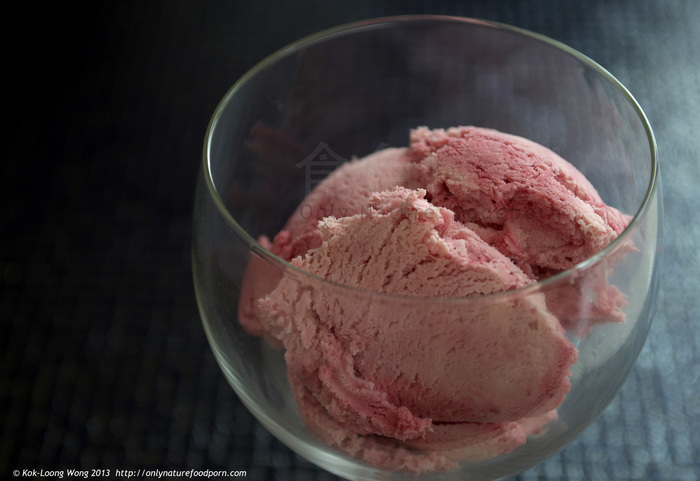
Raspberry Ice CreamThis a ch"easy"t way of making ice cream without ice cream maker. I actually can't see why do we need an ice cream maker. (*) The process of making ice cream is quite simple. Firstly, you have to prepare the custard whether you have an ice cream maker or not. Without an ice cream maker, you pour it to a freeze proof container and put the custard uncover in the freeze for an hour or so until the edge of the custard starting to harden. Take it out and put the semi-frozen custard in a large bowl, and whisk it thoroughly. Pour the mixture back to the container (**), cover, and freeze it until the ice cream is ready to be served.
For this easy to make raspberry ice cream, you need:
First whisk the double, single and syrup in a large bowl until they form soft peak and hold it own shapes. Add 1/2 of the raspberry sauce to the mixture and mix well. Pour the mixture to a freezer proof container and put it to the freezer uncover. Follow as described above (*)....(**) After the second whisk, pour the remaining raspberry sauce to the cream mixture and use a knife gently swirl it into the cream mixture. Ice cream making without the maker! Enjoy! 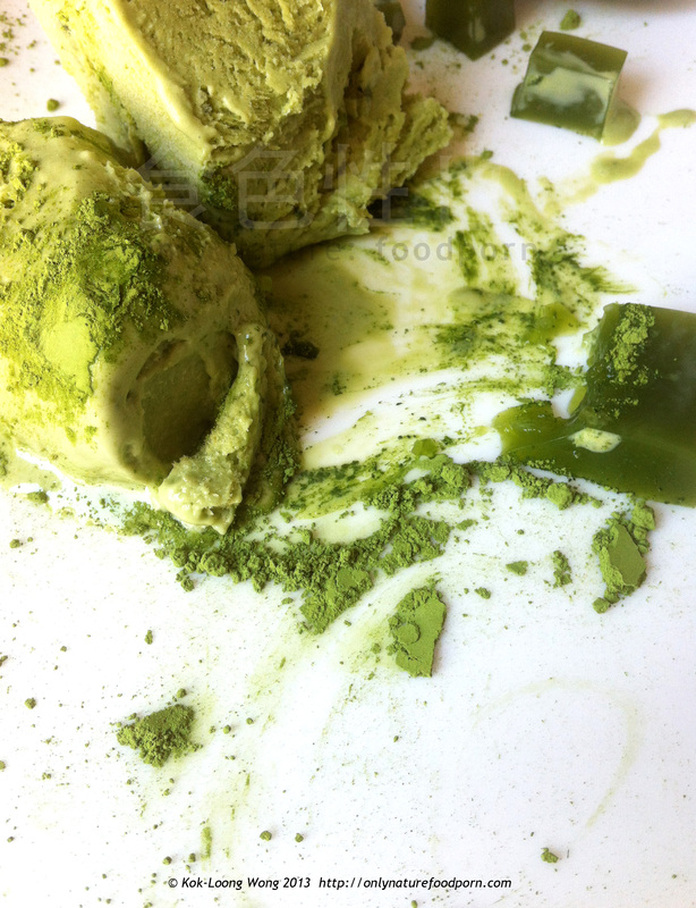 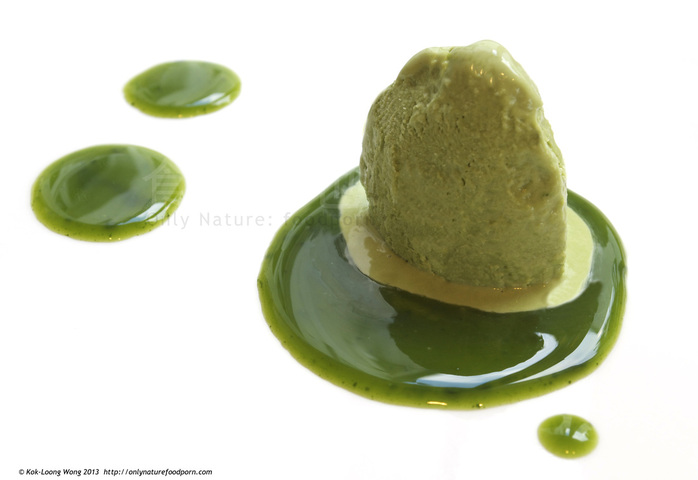 Green Tea Ice Cream and Jelly MessReally like these two photos...many shades of green..colourful! and the messiness and neatness (both have different kind of energy) in it.
A friend bought me the green tea powder from his recent trip to Tokyo. To repay his kindness, I made this ice cream for him. I think it is one of my best home made ice cream! Strong green tea freshness, just the right amount of sweetness! The recipe of the ice cream can be found here... 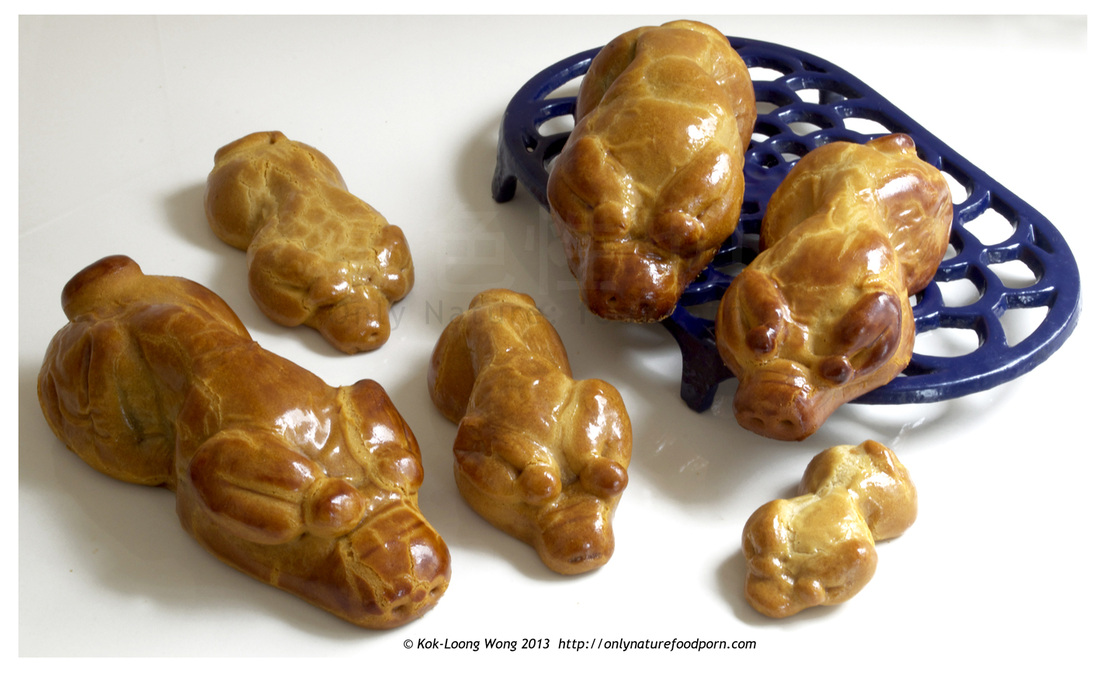 Introducing the Golden Piggy Family!
The first attempt to learn to make these Chinese mooncake inspired pastry. The pastry skin is quite difficult to make. For this trial, instead of using home-made syrup (which I have already prepared few weeks ago. According to the recipe, the freshly made syrup must not be used until it is at least 2 weeks or more old), I read from some online resources, it is OK to substitute the home-made syrup with shop-bought golden syrup. And I also use ready-made sweet adzuki bean paste as the filling for my trial. When I have mastered the whole making process, I will do it properly again with all components home-made! The recipe book I used for this experiment was a bilingual "Moonlit Mid-Autumn Festival" by Choong Su Yin. I bought the mooncake recipe book many years ago when I was in Malaysia visiting my family. I have read it MANY times, but not gutsy enough to try to make them in the kitchen! I am still trying to understand the original recipe from the book, which didn't tell me how long to bake these piggies in the oven. The temperature of 180'C stated in the book seems way too hot for this sweet pastry dough. Maybe I should not have substituted the home-made syrup with the golden syrup? Maybe the temperature of my oven is too hot? Maybe the ready-made filling is not cooked as per instructed as the recipe? But I am quite happy with this first attempt. The flavour is not too bad, sweet scented pastry skin. (slightly too golden syrupy!) A few more attempts to learn the process I think. I am excited! Note: 26.01.2013 - The pastry skin soften after 2 days which make it really close to those shop-bought mooncake's texture. Really quite tasty now! 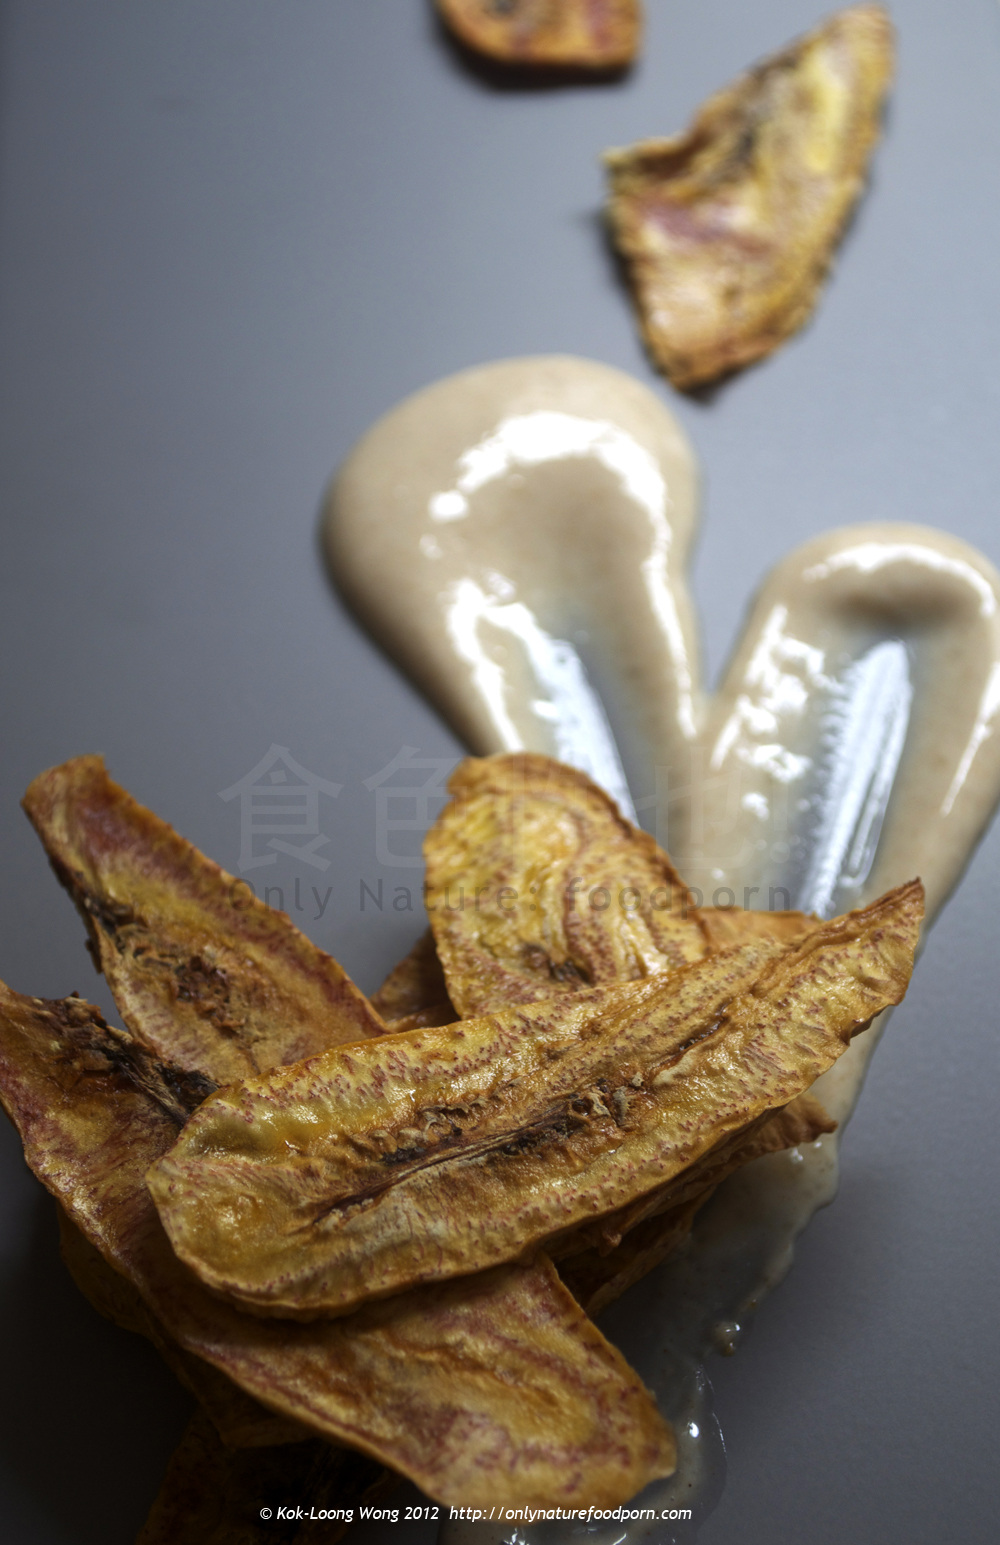
Variation 1: Oven Dried Yellow Plantain with Cinnamon Honey Greek Yoghurt SauceThis is so easy to make and (I think) quite health too as breakfast or snacks in the afternoon. All you have to do is slice the yellow plantain, diagonally, approximately 5mm thick. Lightly oil a baking sheet and arrange the plantain slices on top and dry it in the pre-heated oven, at around 150'C, until the slices are dehydrated. You may want to stop the drying process just before the the slices are completely dry. This will give you a slightly "meaty" end product. To make the cinnamon yoghurt sauce, mix a generous couple tablespoonful of TOTAL 0% Greek yoghurt, 1 teaspoon of cinnamon powder (or more depending on your taste) and 1 tablespoonful honey together. Done! 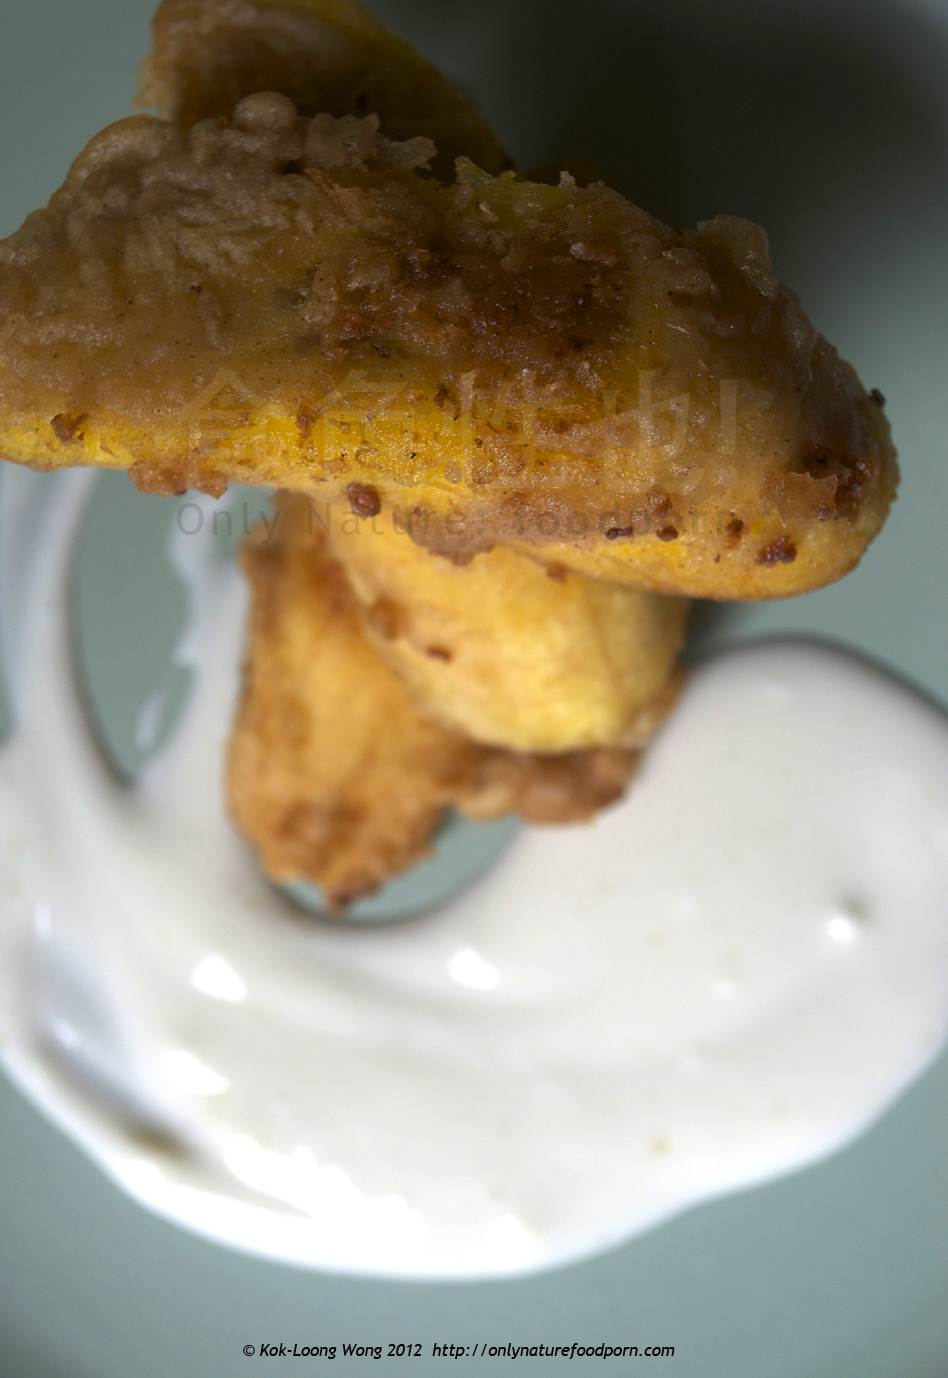
Variation 2: Deep Fried Yellow Plantain with Honey Greek Yoghurt SauceThis is very much a typical Malaysian street food - "Goreng Pisang" (Deep Fried Plantain). For the batter, I mixed the following ingredients together:
Heat generous amount of oil in a deep pan or prepare the deep fat frier. Coat well the plantain (large slices) in the batter and deep fry them until golden brown. Drain excess oil with kitchen towel. Serves it with honey and TOTAL 0% Greek Yoghurt sauce. It is quite a refreshing combination. The yoghurt sauce kind of calm the "heaty-ness" of the deep fried plantain. Yum! 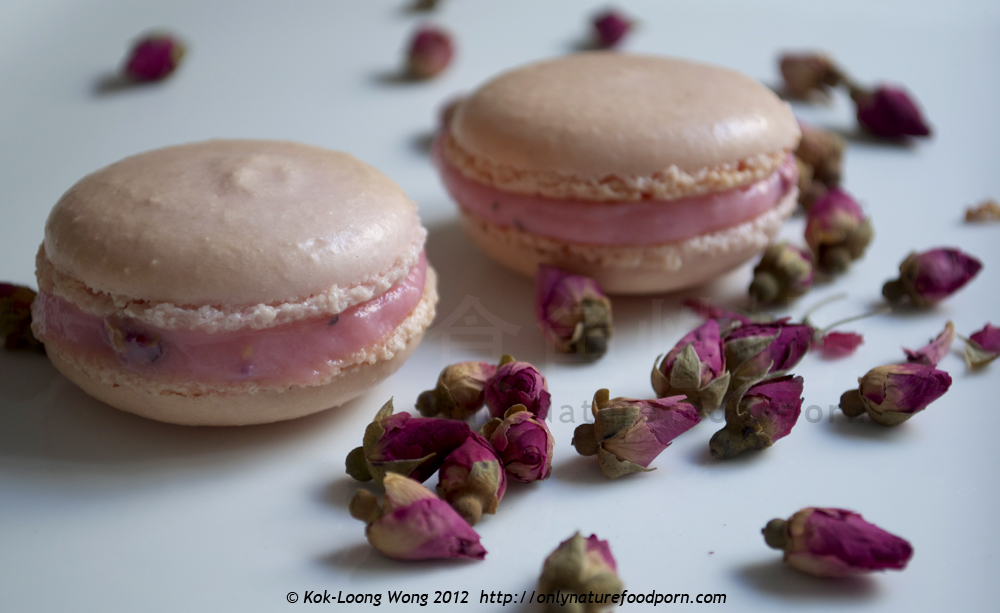 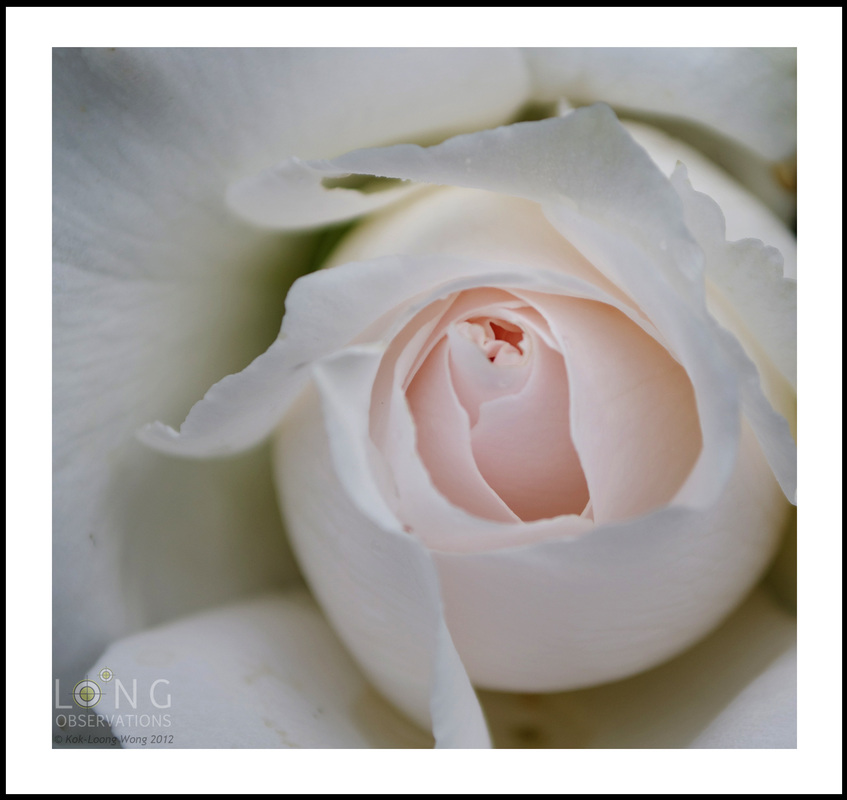 Rose Water MacaroonsI am really having a lot of fun with my weekly cooking challenge. Yesterday, I decided to give macaroon another try - 3rd attempts! I was determined to make it a success this time! I followed the recipe from L’atelier des Chefs (where I took the macaroon making class last year) - word by word (to an extent!) and all the tips that I can remember from the 2 hours class. I even bought a digital scale so that I can measure all ingredients very precisely!
I am quite pleased with the end result! Although the rosy pink colour of the macaroon shells is not as I had imagined (like the rose picture I took recently at Dyke Road Part in Hove) (I think I should have used powder food pigment rather than those liquid type) but I think the overall appearance of the macaroons wasn't too bad! I think I have gained a lot of confidence to make better looking macaroons next time round! I am also quite happy with the photograph of these macaroons with the scatter of the edible dried rose buds. Very lady-like...(I bought these rose buds in a herbalist shop from my last trip to Malaysia. You can use them for making rose tea). I think they look great for a lady high tea...(Imagine the scene Emily and Florence from Little Britain having a I-am-a-Lady high tea moment!...Very Funny!) Depending on the size of the macaroon shells you pipe, this recipe can make at least 24 macaroons. I have adapted the recipe from here. I did add a teaspoon of rose water essence to the meringue mixture. So the macaroon shells have a hint of rosy flavour. I have also sifted the almond powder once before measuring it to the required weight of 250g (and discarded those bigger almond grain for other uses) This I think will result a smoother almond and meringue paste. For the rose flavour filling, I added some crushed dried rose petals to the rose water flavour custard (with red food colouring). I think the not-too-sweet and subtle rose water custard filling complements the sweet macaroon shells very well. Really quite refreshing for an afternoon tea...just like how Emily and Florence would have it when they have their LADY day out in the countryside! 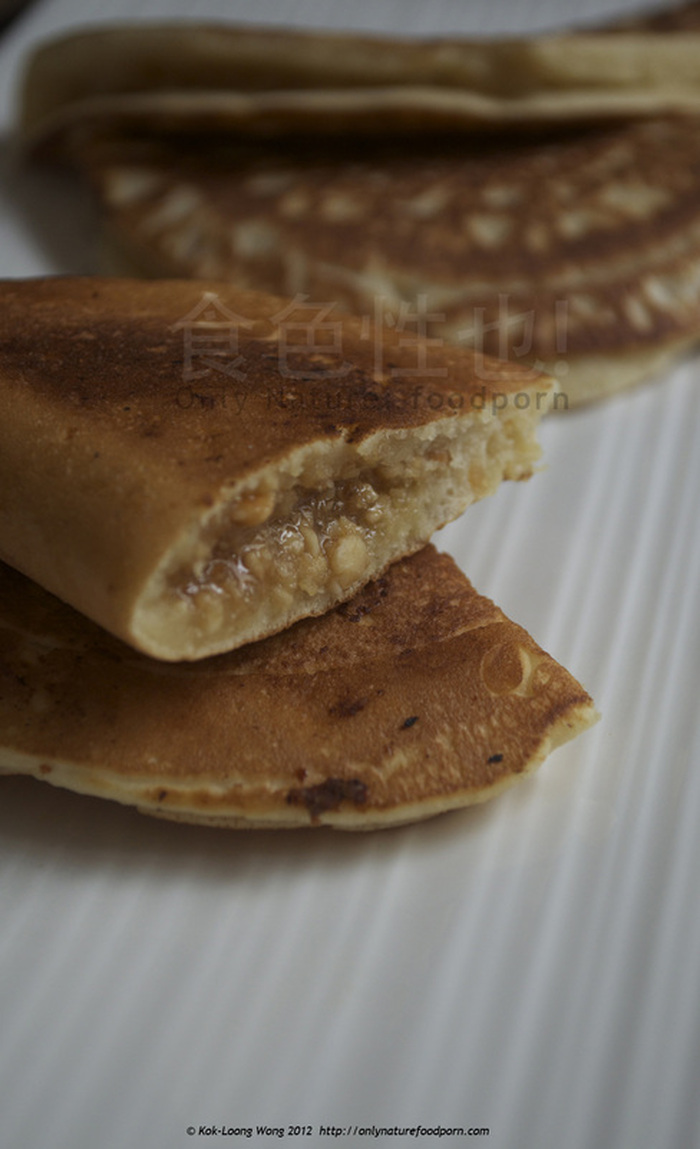
Mock Apam Balik (Scotch Pancake with peanut and sugar fillings)I am having a lot of problems with Weebly image upload lately - I wasn't able to update the blog!
Two weeks ago, I completed a cookery leadership course - Cookability with Brighton and Hove Food Partnership. It was an interesting 10 weeks course. We start from 9:30am until 2pm every Wednesday. The main objective of the course is to train people to lead community cookery courses. These community cookery courses introduce students some basic cooking skills and recipes to prepare fresh homemade meals using affordable local ingredients. Every week during the Cookability session, we have training in food safety/ hygiene, basic food nutrition knowledges etc. Then a couple of hours to prepare (always) very exciting and big group lunch. Each week, the tutor talked a different food group - meat, fish, vegetable, daily etc, and everyone of us (9 students) will prepare one dish according to the week's food group topic. It is always very exciting to see how all these simple ingredients transform into various delicious dishes to share amongst us. Food is really more delicious when shared.. Every week, student will prepare a cooking demo to the class. I have been putting it off due to my lack of confidence! But my time of avoiding it was up at the last training session! I have to give a cooking demo! So I decided maybe making Scotch pancake can be interesting and fun. There are so many different regional pancake recipes I found out. I thought I will demonstrate three pancake recipes using Scotch pancake mix as the basic ingredient and find inspirations from other regional recipes to give the Scotch pancake mix a twist. I made one portion of traditional plain Scotch pancake with homemade blueberry sauce, a portion of honeyed bacon savoury pancake (inspired by North American - Canada in particular - (thanks to my friend Lily!) - bacon and maple syrup) and then the last one, a local Malaysia pancake with crushed peanut and sugar fillings - Apam balik. I have almost forgotten this common Malaysian street food - these pancake are popular as breakfast. I am very happy that I can re-create this pancake at home (although it is not exactly the same as what you will get in Malaysia) but I think they still tasted rather delicious. The slightly salted peanut worked wonderfully with the sugar. To make this mock Apam balik (Apam - fold) (balik - turn)...you need: Ingredients: Batter:
Fillings:
Preheat the heavy based pan. Mix the flour, sugar, egg and milk (little by little) to form a double cream consistency batter. Wipe some oil to the pan, and drop one tablespoonful of the batter to the pan and slowly sprinkler some of the peanut and sugar filling on top of the pancake and cook until small bubbles forming on the surface of the pancake. Slowly fold the pancake in half and wrap the peanut filling inside. Cook until the pancake turn golden on both side of the folded pancake. Repeat the process for the rest of the batter. Serves warm. Make this as the alternative to plain pancake to impress your family and friends! 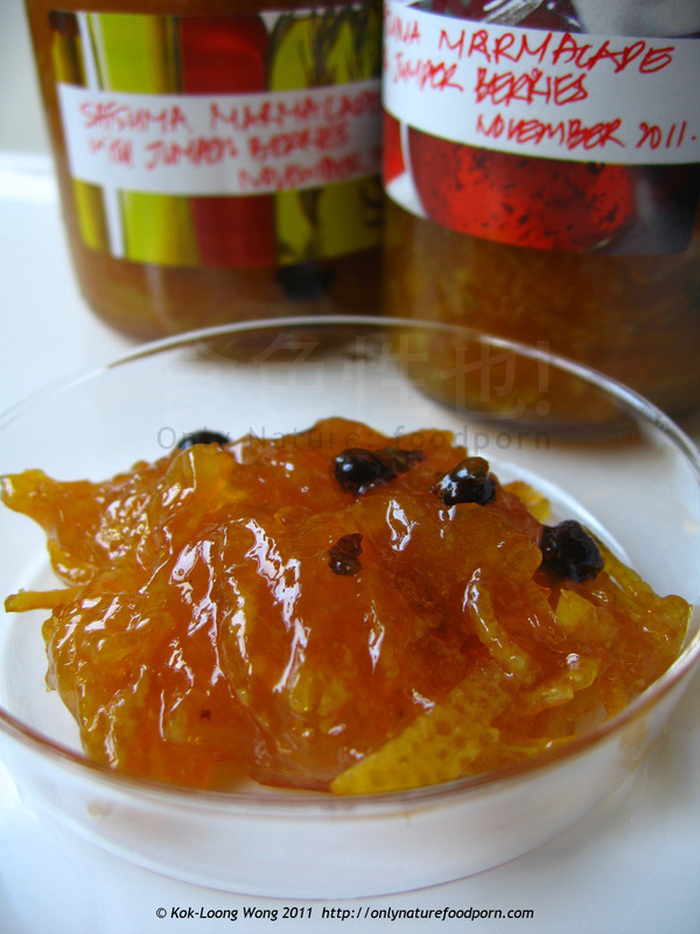 Satsuma Marmalade with Juniper Berries Another versatile fruity preserves. I really like how this marmalade add different dimensions to either sweet desserts or savoury dishes.
For the "pork belly" marinated with these marmalade, the fruity and zesty flavours do enhance the meaty sweetness of the pork. I find the slightly sharp and piney flavoured marmalade is a very good complement to the soften pork fat as well, it seems to lighten it fattiness! But for the "cake" with the same marmalade as one of the ingredients, the subtle citrusy flavour refreshes the buttery soft cake. It works well with dark chocolate too to bring you some end of the year festive feeling.... This marmalade will bring a bit of summery feeling to your food during a cold, dull and grey winter days! (Am I writing a presentation speech!??) Ingredients:
Put all the ingredients in a deep pan, and slowly simmer the mixture until the shredded satsuma peels are soft (I personally quite like the peels to be soft instead of "too soft"). This will take around 45 minutes. Meanwhile, prepare the jam jars by boiling them in the hot boiling water. When the marmalade is thicken, and glossy, they are ready to be put into the sterile jars. Read this "post" for a quick way to know when the marmalade is ready for potting. Seal the jar immediately while the marmalade is still hot. Done! 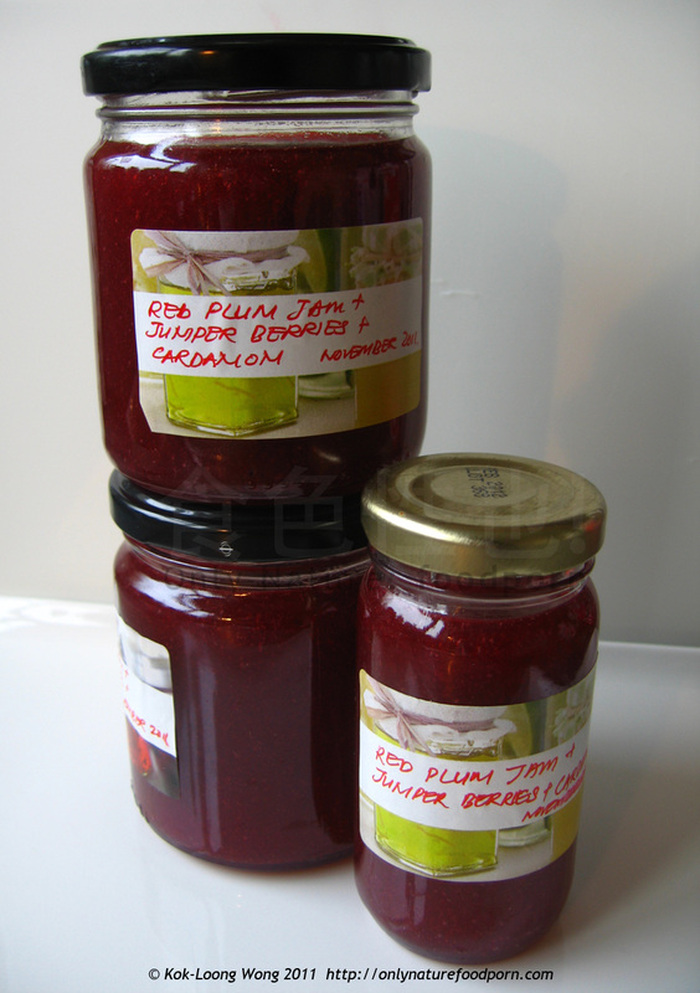 Red Plum Jam with Juniper Berries and Green Cardamom There are quite a bit of "buy one get one free" fruit offers in the supermarket at the moment. There are some out-of-season unripe plums on offer, so I thought maybe it is good to use them to make some plum jam! (Suddenly feeling Christmasy...)
I am sure this is not the proper way of jam making. But it is quick(er) and easy(ier)! Can't wait to experiment these jam with some "creative" recipes...I imagine these spiced (with piney with citrus overtone) plum jam might be good for roast duck..mmmm... Ingredients: (make 2 1/2 jar of jam)
Put all the ingredients in a deep pot and simmer the plum under low heat until very soft. It will take about 30-45 minutes. Once it is done, push it through a sift to another pan. (Keep those bits and pieces too large to go through the sift, I think you can use it for something else..maybe as marinade or baste for roast..) Meanwhile, boil some clean jam jars and lids in boiling water. Put a small plate to the freezer (this is to use as a surface to test if the jam is ready to set) Return the sifted liquid to low heat, and boil until the liquid just starting to bubble. Place a small teaspoon of the liquid to the cold plate and put it back to the freezer for 1 minute. When it is ready, use your small finger to push the jam from one side, if you see wrinkles forming on the surface of the jam, the patch is ready. Remove the jar (one at a time) from the boiling water and drain well. Gently pour the jam into the jar and seal immediately. ALL Done! Wonderful home-made present for your friends this Christmas... 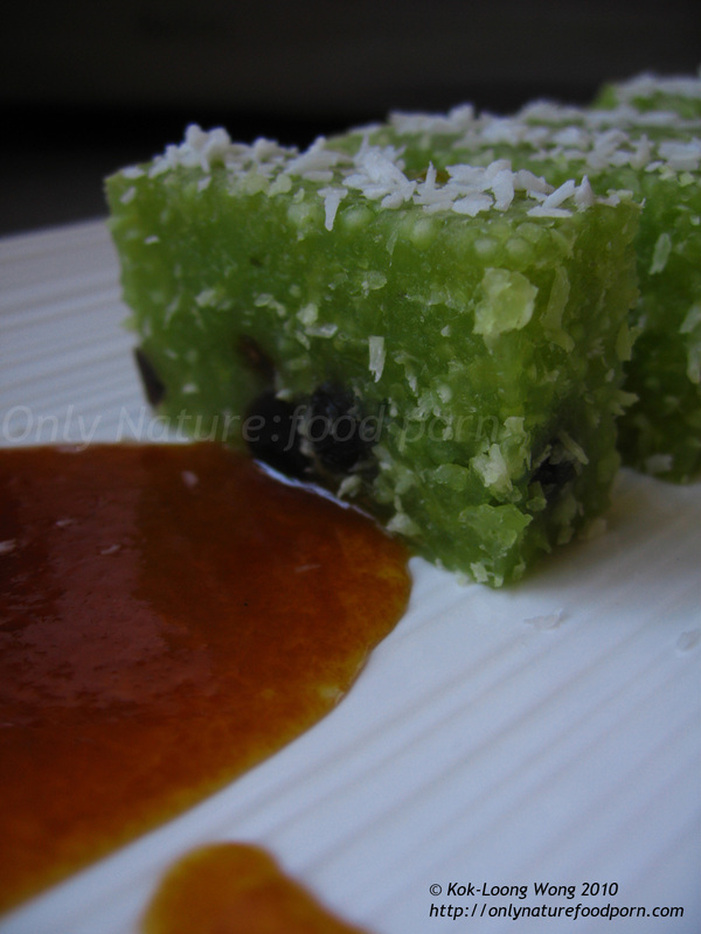 Nyonya Kuih: Sago Pudding with Sticky Palm Sugar Coconut Sauce Never thought sago pearls have other usages other than to make honey dew and sago dessert! I came across some Nyonya recipe books in Malaysia last time when I was there visiting my family. Some of the recipes call for sago pearls to make Malay kuih (cake/snacks in Malay language). Here I am testing some of the kuih recipes!
I wish I made the sticky palm sugar coconut sauce when I served it to a friend, Steven. It makes a lot of different to the kuih...Quite unusual texture and quite springy to chew, the sticky palm sugar coconut sauce make the kuih more flavoursome and really add further taste depth to the kuih too, I think! Ingredients: (For the kuih)
Mix all ingredients in a big bowl and then pour the mixture into a greased glass baking tray, steam the mixture until cooked through (the sago should be transparent in appearance). Remove from the heat and set aside to cool down completely. Meanwhile, in a pan, heat the remaining coconut milk and 1 log of the palm sugar until the sugar completely dissolved and thicken. Cut the kuih into bite-size rectangular shapes and serves it warm or at room temperature with the sticky sauce... 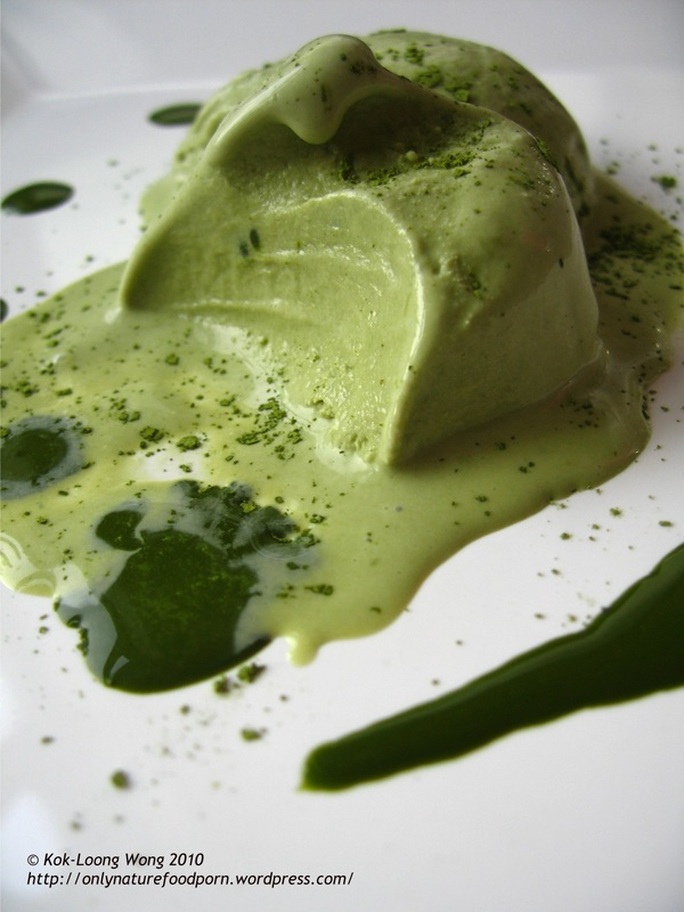 Green Tea Ice Cream Summer time! Almost gone now....
I am making full use of the green tea powder, my friend, Junko gave me as birthday present. I hope she will come to have a taste of this ice cream and give me her Seal of Approval! It's my favourite food...because it is green, my favourite colour! :-) Ingredient:
First, mix matcha powder with the water. Stir and mix well. Set aside. Pour the cream into a large pan, and add the vanilla essence. Bring the mixture almost to boil (when bubbles appear around the edge of the pan). Remove from heat immediately and allow it to cool down for 30 minutes. In a large mixing bowl, put the egg yolks and sugar and whisk until pale and the mixture leaves a trail when the whisk is lifted. Then slowly add in the cooled cream to the egg mixture, stir continuously with a wooden spoon. Cook the mixture over double boiler at low heat for 10-15 minutes, or until the mixture is thicken enough to coat the back of the wooden spoon. DO NOT ALLOW THE MIXTURE TO BOIL OR IT WILL CURDLE. Remove the custard from the heat and leave to cool for at least 1 hour. Stir occasionally. Then add the green tea paste and stir well. It will take a while to have the green tea paste dissolve nicely in the custard! Pour the custard to the freezer-proof container, and freeze it uncovered for 1-2 hours or until it begins to set around the edges. Finally, turn the half frozen custard in the mixing bowl, and beat with a electric mixer until smooth. Return to the freezer and freeze... Note: Personally, I think green tea ice cream should not be too sweet, a little bitterness add more flavour to it. The dark green sauce is concentrate green tea... 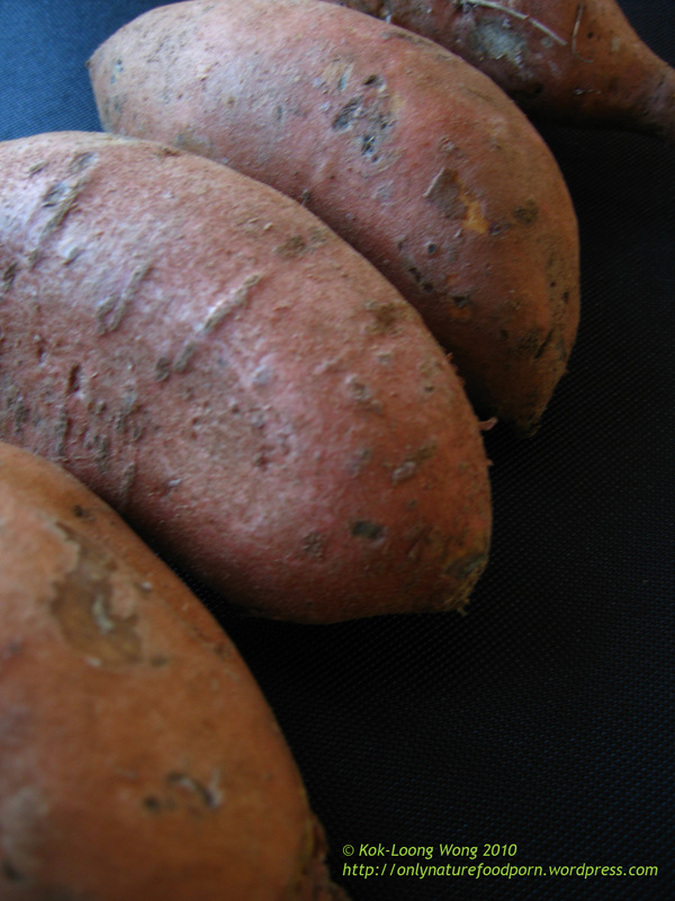 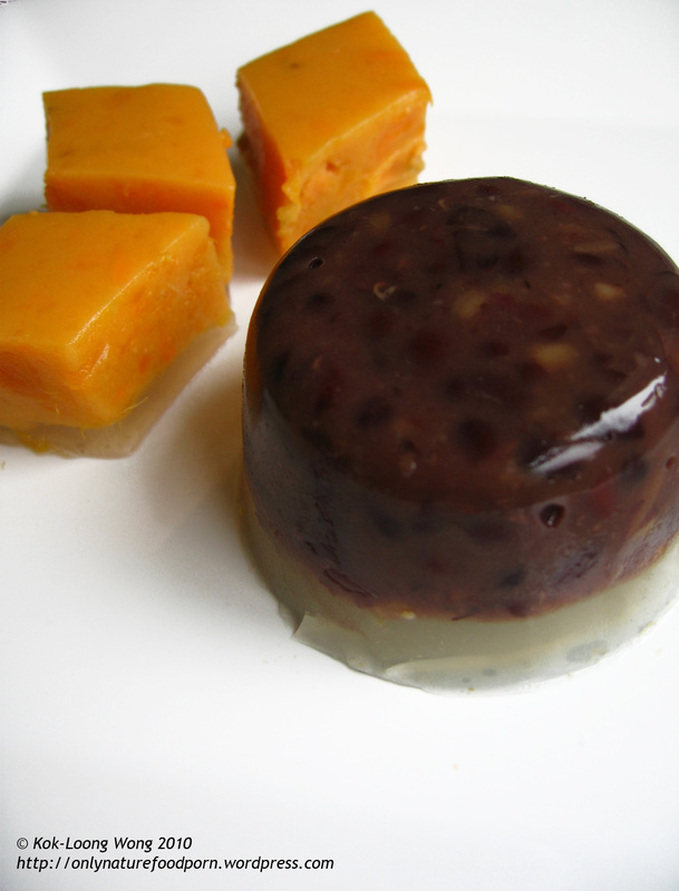 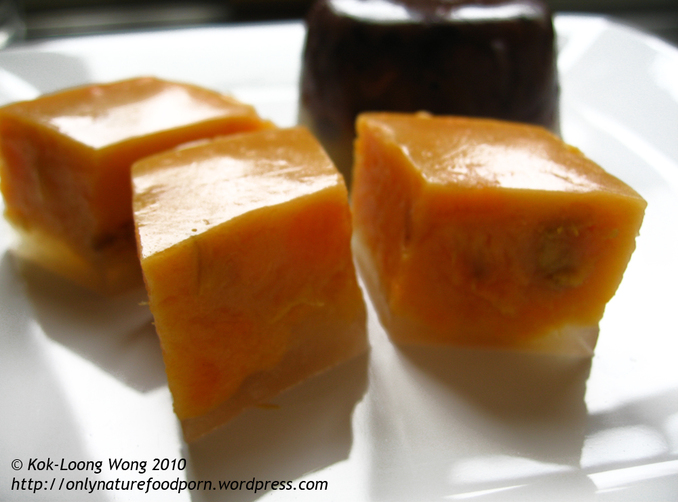 Sweet Potato Jelly - Part 1 What to do with sweet potatoes? hmmm...I bought a bag of sweet potatoes 2 weeks ago, was planning to do the usual honey roast sweet potatoes, but kind of tired of using it in the same way every time! I left it laying around, some started to rot... I came across a Japanese dessert few months ago, love how delicate Japanese desserts look. The recipe called for adzuki bean paste combine with agar-agar...I thought...WHAT IF....WHY NOT...try the recipe with the sweet potatoes?!! I am quite pleased with the experiment. The result: some lovely and appetizing colours! Though, still quite a bit of refinement to do to make it perfect... Ingredients for the paste: To make the Sweet potato paste, you will need:
Firstly, cook the diced sweet potatoes in boiling water. Add sugar and let it simmers under low heat until soften. Stir in the coconut milk and cook until the liquid reduced. Mash the potatoes and set it aside to cool down. For the adzuki bean paste:
Put the bean in the pan and slowly bring to boil under low heat. Add sugar in 3 patches. Stir occasionally. Remove from heat when the sugar has dissolved. Mash the bean roughly. Set it aside to cool down. But for this experiment, I used the following ingredients to make the jelly:
Add all of the ingredients in the pan and bring it to boil until the agar-agar has dissolved. Discard the lemon rind. Add approximately 1/2 cup of the agar-agar liquid to the bean paste and sweet potato paste respectively. Mix well and put the pastes in 2 separate containers. Slightly flatten. (I think the paste should be soft, but is able to hold it's own shape once set.) Slowly pour in the remaining agar-agar liquid over the the pastes and leave to set. The dessert should have two well-defined layers: The paste and the clear layer of agar-agar. Once set, cut the jelly to shape...and enjoy it! 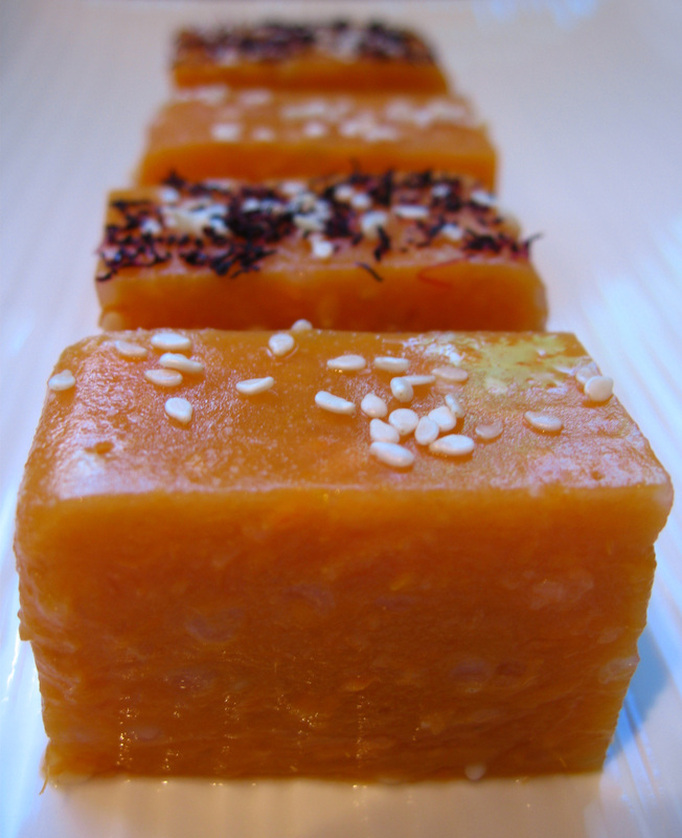 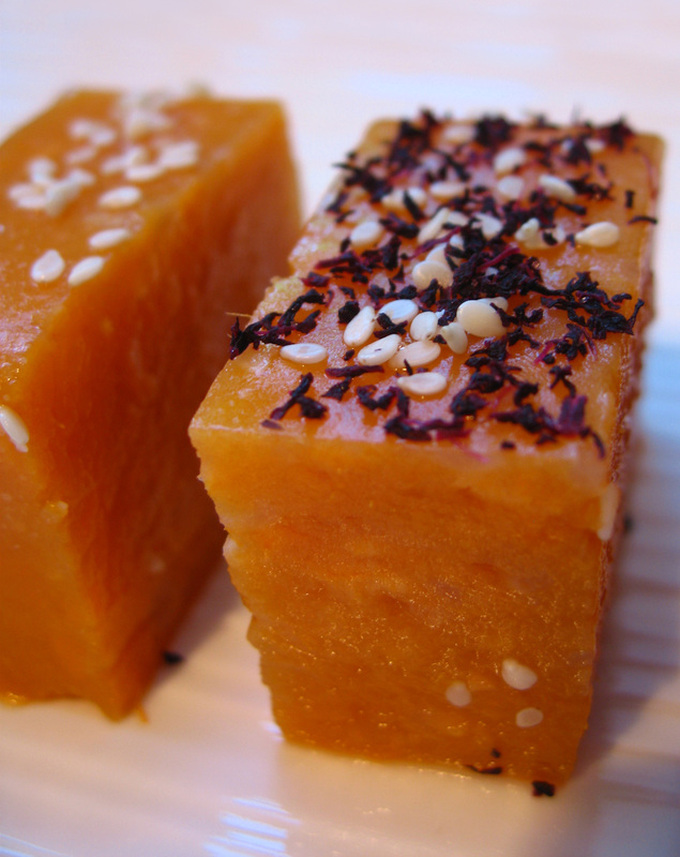 Sweet Potato Jelly - Part 2 Recently I bought a Korean recipe book. I always thought Korean food is very similar to Japanese food. But a Korean friend of mine disagreed. According to him, what you will find in Korea do not necessarily found in Japan...food wise! After reading the basic of what makes Korean food distinctive to Japanese, I then realised that there are actually many Mongolian influences in Korean cuisines! In the recipe book, I came across a sweet potato jelly recipe, which to my surprise quite similar to the experiment I did previously! I thought I invented the recipe...!! But the Korean version has a deeper and more refined taste than previous my experiment! What I have just made is a twist from the original Korean recipe. Ingredients:
In a heavy pan, add the sweet potato chunks and water, bring the water to boil over a high heat. Reduce the heat and simmer the potatoes until soft. Drain the potatoes from the pan, keep the water for later. In a bowl, mash the potatoes until smooth, add in golden syrup, sesame seeds. Mix well. Measure 1 cup of the water used for cooking the potatoes (add more water if the leftover cooking water is less than a cup). Bring the water to boil and turn to low heat, add the tapioca and powdered gelatine and simmer it until the gelatine dissolved and the tapioca turned transparent. Pour the gelatine to the potato mixture and stir well. Grease a mould with a little oil (coconut oil preferably to add a distinct fruity scent to the dessert). Pour the mixture to the mould and set it aside to set. Once set, cut the jelly as you like and serve with sesame seeds topping or something interesting! (I topped the jelly with some Yukari!) A nice and impressive party dessert I reckon and a refinement from the previous experiment. 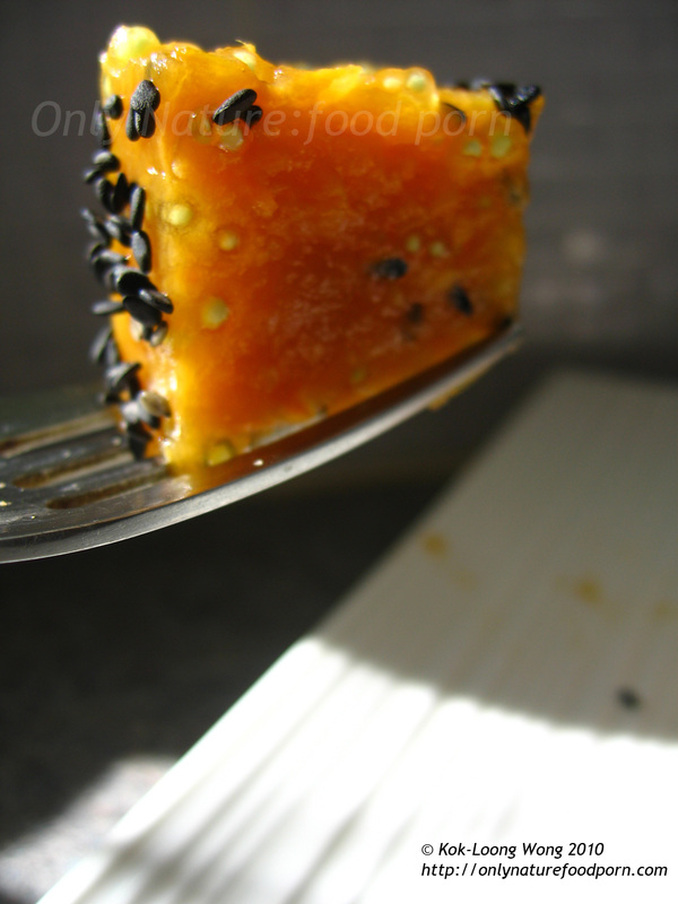 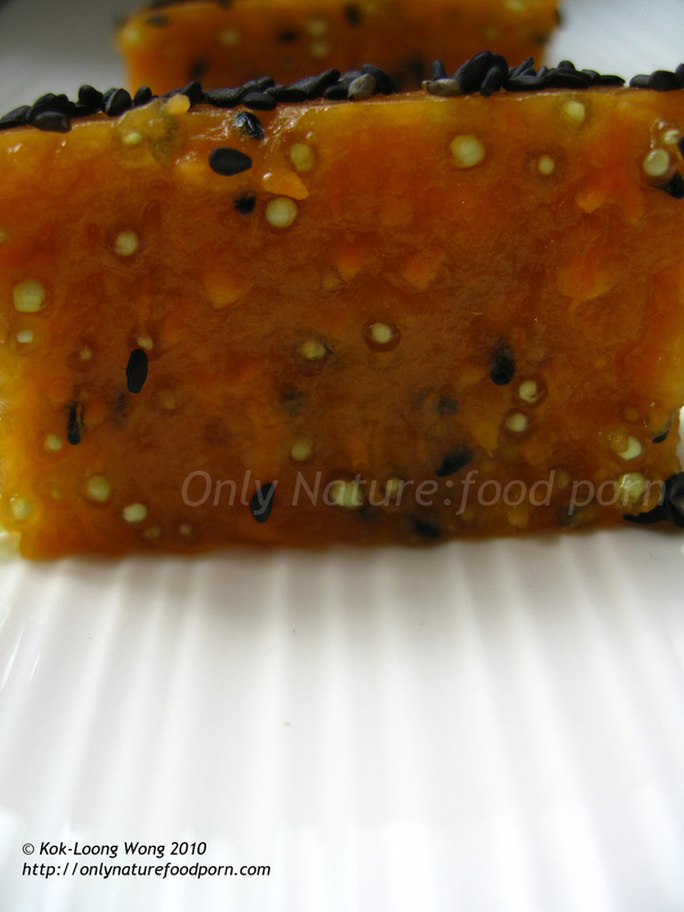 Sweet Potato Jelly - Part 3 I want to make this jelly looks a lot more exciting than the previous two experiments. I found a couple of ingredients in the Chinese supermarket that I think would set nice contrast to the orangey sweet potato.
I have black sesame seeds, black gaint tapioca pearl, and green (pandan) tapioca. I imagine this could be quite a nice concrete mixture for a building! Maybe next time I should specify it for one of my future building designs! Wouldn't be so cool to have some transparent (colourful) marbles in the solid concrete wall. I think the lighting effect would be quite interesting too...(in architect mode while writing this!) Sometimes I forgot that I am an architect when cooking in the kitchen, but sometimes I think about EVERYTHING as architecture! |
AuthorMy name is Loong, I am an architectural designer with a very strong passion and instinct to cook colourful and delicious food....  Loading
VisualsCategories
All
Archives
October 2020
1
1
1
|
 RSS Feed
